November
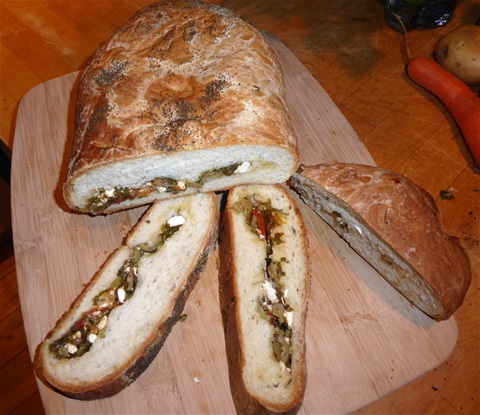
I suddenly had the urge to bake some bread, but wanted it to be something that'd provide us with lunch at the plot, whilst using lots of our home grown goodies. After a bit of a think this is what I came up with, nd rather good it turned out to be. No apologies for it being a bread mix, although of course purists can make it with strong flour and yeast with no trouble!
Parsley and Feta loaf
What you need:
500g white bread mix (or 500g strong flour & 4g dried yeast)
25g salted butter (You could miss this out but it makes a better texture imho)
300ml warm water
Stuffing: a cup and a half packed down, of chopped parsley, eight to ten drained half cherry tomatoes in oil, about 15 stoned green olives, one finely chopped large shallot or a small bunch of salad onions including the green leaves, half a pack of feta cheese, crumbled
4tbp olive oil (the oil from the tomatoes if there is enough)
1tsp ground black pepper
2tbp poppy seeds
What to do:
1. Rub the butter into the bread mix
2. Add most of the water and mix with a knife, then bring the crumbs together to make a ball, gathering all the loose mix from the bottom of the bowl. Use more water if needed but don't make is sloppy
3. Knead the dough for 12 -15 minutes so that it is smooth and springy. (I keep it in the bowl, tilted right over sideways toward my kneading hand, rather than make the worktop all floury) Add a little more plain flour if too sticky
4. Cover the dough with a damp teatowel or a damp clean J-cloth and leave for 20 minutes in a warm place
5. Now make the filling: chop the parsley, olives, onion and tomatoes roughly and crumble in the feta. Put to one side
6. Put the dough onto a baking tray lined with a silicon sheet and stretch it into a rough rectangle
7. Brush the olive oil over the surface, leaving a 2cm wide strip clear around the edge of the dough
8. Spread out the filling: easier to use your hands to keep it inside the oiled area, and sprinkle on the black pepper
9. With clean hands, roll the dough towards you by one long edge, easing it off the silicon sheet as you go, to form a swiss roll shape. Manoeuvre the loaf into the centre of the silicon sheet on the tray, seam side underneath
10. Wet your hands and dampen the top of the loaf; sprinkle the poppy seeds over evenly
11. Cover the loaf with oiled clingfilm and leave in a warm place to rise for 50 minutes After 30 minutes preheat the oven to 180°C
12. Remove the clingfilm and put the loaf, on the tray, into the oven for 40 minutes. It should sound hollow underneath when tapped. If it doesn't, then return it to the oven for a further five minutes
13. Take the loaf out of the oven and leave to cool on a wire rack to keep the bottom crisp
And that's it! It doesn't really need buttering before you eat it as it is very moist, and keeps well wrapped in a cloth. As long as you keep the proportion of filling to dough, you could use any herbs you like, replace the feta with cheddar, leave out the olives or add in more tomatoes, or any other variation you might enjoy. I quite like the idea of parsley and walnuts with parmesan, so that might be next!
October
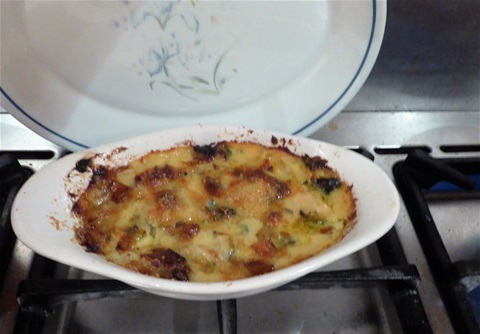
Leek and Chard Bake
Leek & Chard Bake
This might seem an odd time in the year to include a leek recipe, but we were given a mammoth one from someone who shows leeks and even when cut up was a huge quantity of leek! Our few little chard plants planted underneath the wigwam of climbing french beans had enough leaves to pick, and so here is what they ended up as.... and it freezes well too, which was very useful, given the amount there was! This is one of those recipes with slightly vague quantities, so you can make it with whatever you have to hand really. I have given here the amounts of each vegetable I used... and you may notice baby pattypans creeping in too! I have also made a version that included sliced red peppers, which was very tasty.
What you need (This made two dishes full, each to serve 2 generously. You can make one big dish if you like)
2 cups of sliced leeks
6 stems of chard, picked when stem sections were about 15-20 cm long
1 cup of sliced baby patty pans
1 tbp sunflower or vegetable oil
1tbs plain flour
25g butter
3 cups of milk
½ cup grated cheddar or goats' cheese
large pinch of ground black pepper
2 heaped teaspoons of fennel seeds
2 tbs grated parmesan (You can use cheddar or goats cheese here if you like)
What to do:
1. Preheat the oven to 200°C
2. Prepare the vegetables, and share them between two shallow baking dishes, buttered lightly
- leeks: slice stems into 1cm pieces, sweat in the oil until almost transparent, but not browning. Drain well.
- chard: slice stems crossways into ½ cm pieces and fry gently until slightly softened. Add fennel seeds and fry for a further rminute until you can smell the fennel. Put in baking dish
-: Wash the leaves and blanch in boiling water until just wilted. Drain thoroughly and roughly chop them. Put to one side, not in the dishes
- patty pans: using same pan, fry gently until slightly browning on both sides. You may need a little more oil.
3. Now make the sauce
- In a small non-stick pan, melt the butter, put in all the flour at once and stir to combine.
- As soon as it starts to colour, put in all the milk and bring to the boil, stirring occasioannly to make sure there are no lumps. Cook for two minutes. If it is very thick and gluey, just add a little more milk
- One it has thickened, take off the heat and add the cheese. Stir to melt it all in evenly. If the sauce is very thick, you can add a little more milk but don't make it runny, as the juice from the vegetables will mix in once it is in the oven
- Stir in the chopped chard greens, and the black pepper
4. Pour the sauce and greens over the vegetables in the dishes. Stir it in slightly but don't worry too much as it will combine further once it is cooking in the oven
5. Scatter the cheese across the top, wiping any that is on the edge of the dish so that it does not burn (You can see from the photo that I could have made a better job of this!)
(At this point, let the second dish cool, wrap well -label- and freeze for up to 3 months. I used two freezer bags. Thaw before cooking)
6. Put in the oven for 15 minutes until golden and bubbling.
As I made this to accompany a roast dinner, it went in the oven towards the end of the time the potatoes were cooking. It is also good with sausage and chips, or scrummy on its own with some decent bread.
September
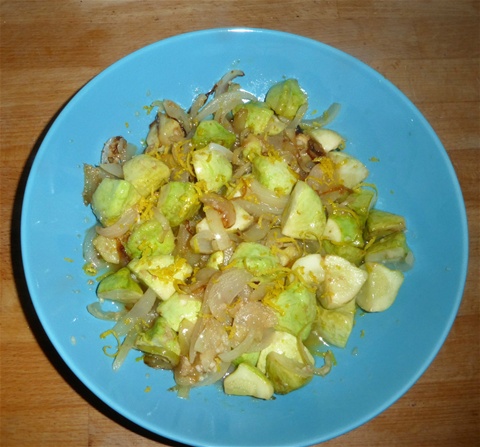
Baby patty pan squashes in garlic, lemon & olive oil
Baby Pattypan Squash with Garlic & Lemon
Having had masses of large white pattypan squashes, more than enough really, I decided to try cutting them when they were really small and tender. They do remind me a bit of artichoke hearts like this, hence the idea of cooking them with garlic, lemon and olive oil, and I must say it was a great success. Several people have asked for the recipe, which is pretty basic to be honest, but here it is.
I guess you could also cook small courgettes or other squashes with soft skins in this way, or even larger ones cut into chunks, but the pattypans look pretty and turn a beautiful shade of pale lime green which does not really show up so well in the photograph.
What you need:
2 cupsful of small squashes about 3cm across, or slightly larger ones in halves or quarters so that each piece is a similar size.
4 cloves of garlic minced finely
2 medium onions cut into 50mm slices
pinch of salt
zest of 2 lemons and juice from one (minus pips!)
3tbs olive oil (You could use sunflower or other vegetable oil if you prefer)
What to do:
1. Gently fry the onion until translucent and then add the garlic and pattypan pieces to the same pan. Cook until the squashes are just tender when pierced with a knife: about 5 minutes
2. Add the salt and lemon juice and cook for a further two minutes
3. Sprinkle the lemon zest across the top and stir in gently
I did say it was basic, but I hope it is helpful in using what could easily become another glut crop. Once this is cooked you can cool it and serve at room temperaure with crusty bread, or, as we had last night stirred into cooked pasta, with another glug of oil if needed. Chopped parsley or basil are good additions too, and you can substitute white wine for the lemon juice, although I would still stick with the lemon zest as it adds a real zing.
August
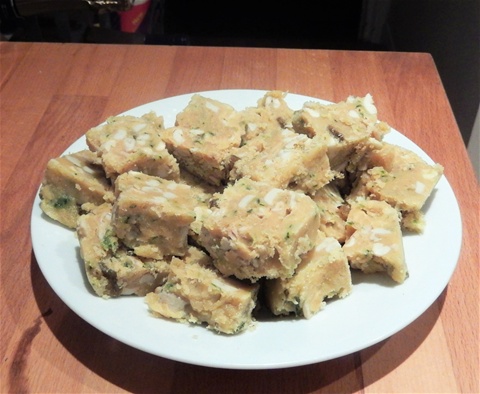
Courgette Halwa
Courgette Halwa
This is the sweet dish I mentioned in this week's blog, based on a recipe from Akila Krithivasan who lives in India. She uses peeled pumpkin but I thought I would give it a go with courgette, and as courgette has such a thin skin, I left it on. The results were very good. I also substituted butter and oil for the original ghee, as this is not always easy to come by. So, with thanks to Akila, here it is. Be warned, it is incredibly sweet, somewhat like a good fudge, but very more-ish!!
What you need:
1½ cups of grated courgette
1½ cups of white granulated sugar (although brown sugar would impart an alternative flavour)
1 cup of milk powder (This is the full fat version that is sold in Asian supermarkets for sweet-making, not the powder that is sometimes added to coffee etc)
100g butter
3tbs sunflower or vegetable oil
½ cup cashew nuts
1 tsp ground cardamom seeds (from green or white cardamom pods)
½ tsp turmeric or saffron
What to do:
1. Put half the butter and the oil in a non-stick pan, and add the courgette. Saute for about 5 minutes: it should not change colour
2. When the courgette is soft, add the sugar and about quarter of a cup of water. Stir to dissolve the sugar
3. Cook until it seems thicker... there will be no surplus water but the mixture will still be fluid at this point
4. Stir in the milk powder and the rest of the butter. Keep stirring.
5. After about 6-7 minutes, the mixture will start to come together to make one large soft mass. Incorporate the nuts and turmeric or saffron, and put the hot mixture into a non-stick baking tray roughly seven by five inches.
6. With the back of a wet spoon, smooth the top. Be careful it will be very hot.
7. Leave for half an hour and then carefully cut into squares, but leave in the pan for a further 30 minutes before taking it out. ( I cut this batch up too soon, hence it looks a bit ragged around the edges)
8. Chilling the halwa improves the flavour further.
I have added green raisins to this, or used large coconut flakes instead of cashew nuts. Pistachios would also be very good

Courgette fritters with mint and chilli
Courgette Fritters
There are usually more than enough courgettes to go around in the Summer, and so lots of different recipes to use them are usually welcome! This one is quite basic, but the flavours can be varied, and they are just as good cold as they are freshly cooked. This quantity makes about 12-14 fritters
What you need:
350g courgette, grated
4 heaped tbs plain flour
2 large eggs
3 shallots or a small onion, finely sliced
3 tbs oil for frying (I used sunflower oil)
1 level tsp salt
1 level tsp ground black pepper
3 heaped tbs finely chopped mint
2 finely sliced green chillies (or ½ level tsp chilli powder)
What to do:
1. Put all the ingredients except the oil in a bowl and mix to a soft consistency
2. Heat the oil in a frying pan and drop in three or four separate spoonsful of mixture
3. Cook on a medium heat for 3 minutes or thereabouts per side. They will be golden brown when ready
4. Take out the fritters and drain on kitchen paper while you cook the next batch. (You may need some extra oil for the third or fourth lot)
Chives and feta cheese are a tasty combination (about 100g feta cut into small dice), as is dill with well drained, chopped pickled cucumber or gherkin, or roughly chopped spring onions with 100g grated cheddar. Smoked paprika is also good in place of the chilli
July
Seafood paella
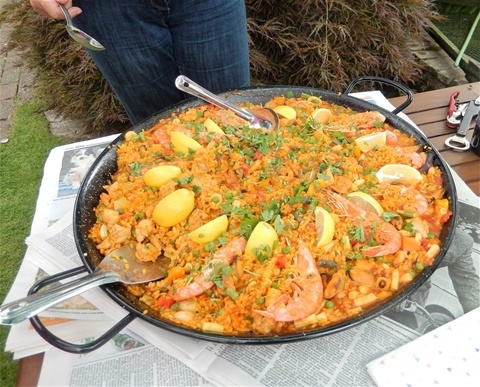
Seafood Paella
This is only seasonal in that it is a very easy dish to cook for friends to eat in the sunshine in your garden! The quantity, which feeds around twelve hungry people, can be readily adjusted to cater for fewer, and if you have no paella pan a frying pan will do the job. Some people have allergies to sea food and this can be made just as successfully with chicken.
What you will need: (for a 45cm pan)
750g paella rice
8 tbs olive oil (or sunflower)
1 large onion finely chopped
2 red peppers, diced
8 cloves of garlic, chopped small or squidged to a paste
4tsp paprika & 2tsp smoked paprika
3tsp paella seasoning or saffron
500g frozen mixed seafood
200g frozen shelled prawns
200g large prawns in their shells (optional)
2l chicken stock
1 can of chopped tomatoes or about six large very ripe tomatoes, skinned and chopped
1 large handful of french beans, chopped into 1cm pieces
1 handful of peas, either fresh or frozen
1 handful of chopped flat leaf parsley
2 lemons, cut into long eighths
What to do:
1. Put oil in the pan with the onion and pepper, and cook gently until the onion is translucent and the pepper soft
2. Stir in the garlic, paprika and saffron (or seasoning) and cook for 1 minute
3. Add the rice and mix gently until all the grains are coated in oil
4. Pour in stock, bring to boil and simmer for 10 minutes, stirring occasionally to make sure it cooks evenly and does not stick
5. Add the seafood, beans, peas & tomatoes and cook for a further ten minutes, adding more hot stock if needed. If you are using the whole prawns, arrange them so they are partly submerged to cook right through. There should still be some sauce left, but not a lot, and the rice just tender. Organise the whole prawns neatly before garnishing the dish.
6. Put the sliced lemon around the edge and garnish with the parsley to serve.
If you want to also add mussels in their shells, these should be put in at the same time as the whole prawns. Scrub them first to remove any grit, and discard any that are open, even slightly, before they are added, as these may well be dead. As soon as the live mussels are cooked, the shells will open and they are ready to serve on top of the rice.
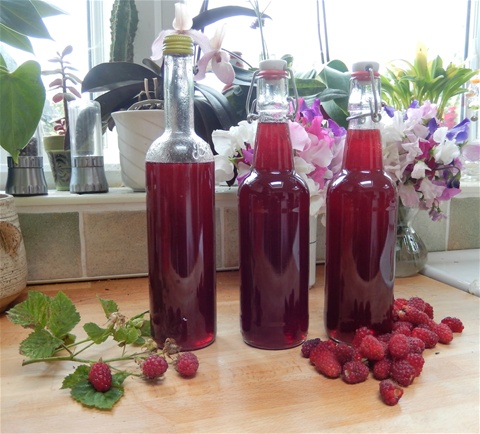
Loganberries with bottles of cordial
Loganberry Cordial
Loganberries are a very tart fruit that need quite a lot of sugar to make a palatable cordial... remember though that it is diluted with plenty of water or soda water when you drink it, so it is not quite so unhealthy as it might seem. You do have the added bonus of knowing there is nothing artificial added if you make it yourself. The fruits have a waxy coating to them, which separates when the mixture is brought to a rolling boil so that it can be removed.
What you need:
6 cups of loganberries
3 cups of water
6 cups of granulated sugar
Juice of two lemons
1 tbp citric acid
2 campden tablets (This prevents any fermentation in the bottle)
What to do:
1. Sterilise your bottles -- this makes about 175 ml of cordial so choose bottles for this volume in total. A hot soapy wash and then dried in the oven on a low heat, or washing them in the dishwasher both work well
2. Put the berries and water in a large pan and heat gently until it is boiling. Cool for 15 minutes
3. Strain through a jelly bag and let it drip into a large bowl for at least 12 hours, or overnight
4. Pour the juice into the large pan and add the sugar. Heat and stir until the sugar is dissolved
5. Boil rapidly until the waxy coating is see as a "scum" joined together at one side of the pan. Scoop this out with a slotted spoon. You might need to do this two or three times to get rid of as much as you can. (Any left will float on the surface of the cordial when it is in the bottle)
6. Stir in the citric acid and lemon juice
7. Leave to cool for about 15 minutes, crush the campden tablets and add to the syrup
8. Pour into the prepared bottles through a fine sieve over a funnel (sterlise both with boiling water first) to remove any remaining pips
This will keep for at least three months in the fridge. It makes a very refreshing drink with soda and ice, especially with added mint leaves
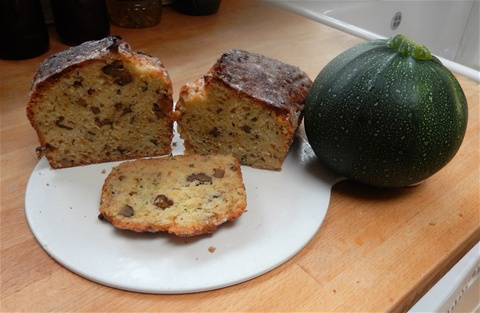
Lime & Walnut Courgette Cake - any shape courgettes work well as they are blitzed
Lime & Walnut Courgette Cake
This cake has no discernable taste of courgettes, it is just beautfully moist and more-ish! A friend asked me today if did actually have any courgette in it -- yes, two! One green and one yellow!!
The quantities given make two loaf shaped cakes in tins 13 cm by 23 cm. It keeps very well wrapped in foil, and is so easy to make it is well worth making two at the same time... they will be eaten quite quickly to be honest!
What you need:
450 g plain flour plus 1½ tsp bicarbonate of soda, or 450g self raising flour
1 tsp salt
4 medium size eggs
300g granulated sugar, either white or golden
235 ml sunflower oil
100 g plain yoghourt
zest of two small limes plus 1 tbp juice
2tsp vanilla essence
225 grated courgette (I blitzed mine in a food processor)
150 g chopped walnuts - not too small as you want some texture
For the topping - zest of one lime, 2tbs lime juice and 2 tbs granulated sugar
What to do:
1. Preheat the oven to 180°C
2. Line two loaf tins with greaseproof paper and lightly oil, using some of the measured volume of sunflower oil
3. In a large bowl, stir together the eggs, sugar, oil, vanilla, lime juice and zest
4. In a second large bowl, mix the flour, plus bicarb if using, yoghourt and salt
5. Add the liquid to the dry ingredients and combine well. Stir in the chopped nuts
6. Divide the mixture equally between the two tins and cook for 50-55 minutes. Check after 50 minutes to see if the cakes are cooked, by poking a skewer in to ensure there is no raw mixture left clinging to the skewer when it is pulled out again.
7. Leave to cool in the tins for 20 minutes, and then turn out before slowly spooning the topping mix onto the top of each cake. Allow it to soak in and cool for a further 20 minutes at least before slicing to serve.
(Dissolve the sugar in the lime juice and add the zest, to make the topping mix)
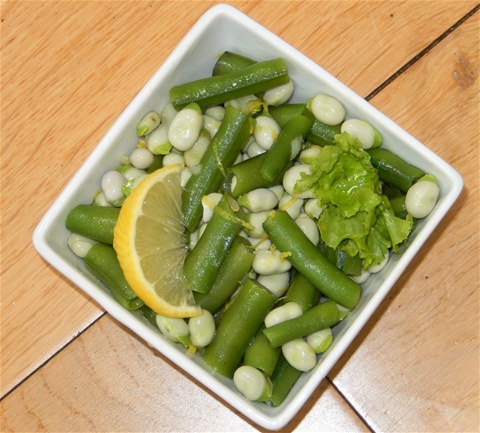
Broad beans with garlic and lemon
Broad beans with Garlic & Lemon
This week we had to unexpectedly harvest our broad beans to save them from being eaten by rats, and so we had lots of pods where the beans had not yet developed. Never eaten these before, so I was a bit tentative about this recipe. It turned out just fine and I can recommend it! You could of course make it with all beans if you have no pods, or include french beans instead. There are two schools of thought as to whether to skin the beans themselves or not, but to me much of the unique flavour of broad beans is in the skin, so unless they are massive beasts, I leave the skin on ...a matter of individual taste really.
What you need:
2 large handfuls of podded beans, blanched for 3 minutes
2 large handfuls of young pods, trimmed and cut into 2 - 3 cm pieces and also blanched for 3 minutes. You can blanch both together.
2tbp olive oil (I used extra virgin because there was some in the cupboard, but really you could use any oil that you like the taste of)
2 large cloves of garlic, skinned, sliced and then mashed with some salt to a paste
Juice and zest of a lemon
1 level tbs dried thyme leaves, or twice the amount of fresh
Salt and pepper to taste
What to do:
1. Rinse the blanched pods and beans in cold water and drain well. This will get rid of any scum that rose to the top when blanching, and put them in the serving bowl
2. Pour the olive oil into a small bowl with the lemon juice, garlic, salt and pepper and whisk well to emulsify into a thickish dressing. Taste to check seasoning and adjust if needed. Stir in the thyme leaves
3. Pour the dressing over the beans and mix well
4. Add the lemon zest directly onto the beans and mix gently
You can vary this by adding chopped parsley or summer savory in place of the thyme. This makes a tasty accompanment to barbecued meats, and makes enough for three generous servings or four smaller ones
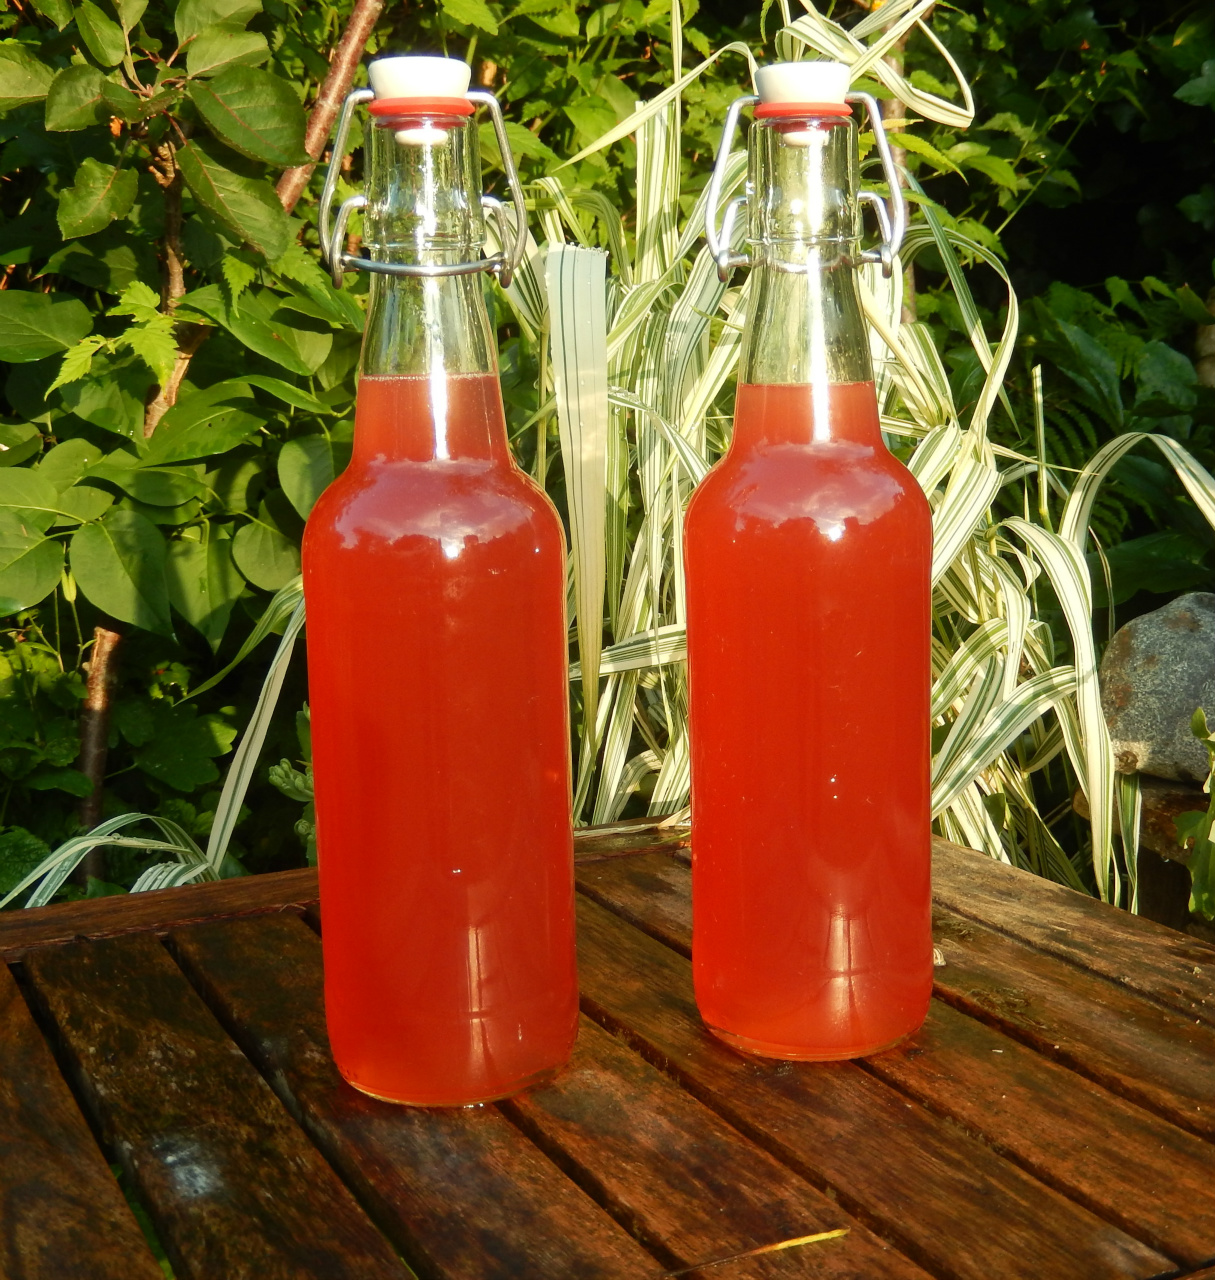
Rhubarb & Ginger Cordial
Here are the two 550ml bottles I made this week. The bottles came from Wilko, but any clean, screwtop bottles will be as good
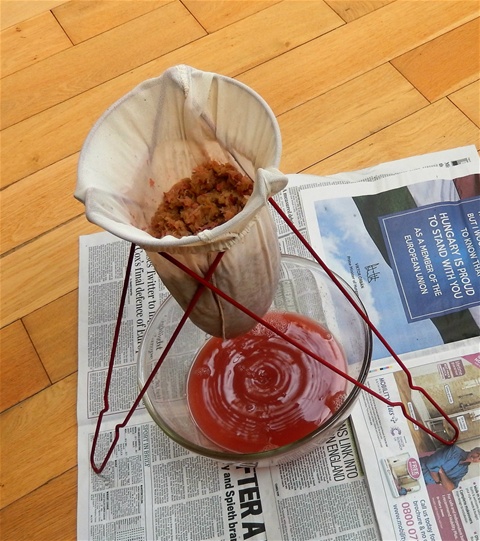
Straining the pulpy rhubarb
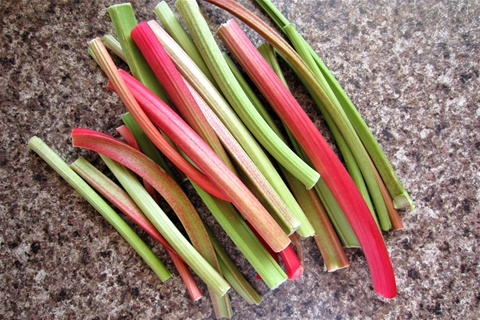
I have seen recipes using cooked rhubarb but I wanted to try using it raw as I thought it might be a better colour and maybe a fresher flavour too. Quantities are a guide, as it depends on how juicy the rhubarb is. This makes about a litre of cordial, maybe slightly more. The colour depends on what rhubarb you use. I used half green and half red as that is what I had available. All red would give a stronger pink and all green lighter, but they both taste the same
What you need:
3lb of rhubarb, washed and cut in chunks
800g - 1kg granulated white sugar
1heaped tbsp citric acid
Juice of one lemon
2 pieces of fresh ginger about 4-5cm long and fairly thick
What to do:
1. Using a food processor or blender, blend up the rhubarb until it is a pulp. It will look fibrous. You might need to do this in two batches.
2. Put the pulp into a clean jelly bag or tie in clean muslin, or a thinnish teatowel and allow to drip overnight. Do not squeeze it or the juice will be cloudy
3. Peel the ginger and slice thinly
4.Pour the juice into a large saucepan, ideally non-stick, but definitely not aluminium, and add the sliced ginger. (You do not need the pulp now)
5. Add the sugar. Start with the lower amount and add more to taste. Stir to dissolve
6. Bring to the boil and then simmer for ten minutes to extract the flavour from the ginger. The syrup will go a darker shade of pink and there will probably be scum on top
7. Bring to a rolling boil, scoop off most of the scum and turn off the heat. Add the citric acid and lemon juice
8. Stand the saucepan in about 10cm of water in the sink to cool it fairly quickly to hand hot. (Feel the outside of the saucepan) Remove the ginger with a slotted spoon
9. Using kitchen roll (one that does not disintegrate when wet) or a new J-cloth to line a funnel, strain the syrup into sterilised bottles and seal.
Dilute to drink, either with water or tonic water for example. I am sure it would also make a good mixer with vodka or gin! The cordial will keep in the fridge for about 3 months.
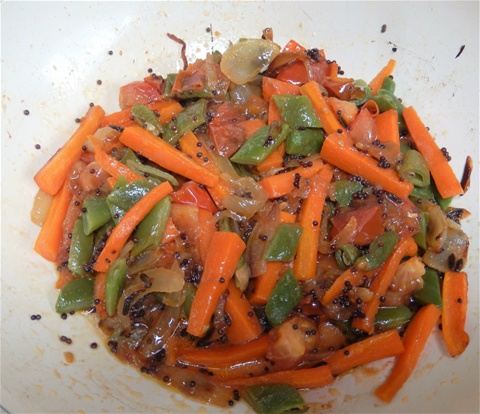
Carrot and Green Beans ready to serve
Spicy Carrots and Green Beans
A really good way to use up any runner beans left in the freezer, and it is equally good with french beans. Last night we had it as an accompaniment to lamb, potato and spinach curry, served with plain chappatis, but it is nice enough to eat by itself. Amounts are not precise so it tends to vary a bit every time. If you like hot spicy dishes add finely chopped green chilli with the carrots
What you need:
1 large carrot cut into batons, or smaller carrots cut to similar thickness, or whole if very small
a good handful of green beans in pieces about 1cm long
1 large onion, sliced in pieces about ½ cm wide
2 tbsp black mustard seeds
1 tbsp fennel seeds
pinch of salt
2 tbsp sunflower oil
What to do:
1. Gently fry the onion in the oil until it is soft and just beginning to colour round the edges
2. Put in the carrot (and chilli if using) and continue to fry until the orange colour is coming out of the carrots into the oil
3. Add the mustard and fennel seeds, and cook until the seeds are sizzling and popping
4. Put in the green beans, salt and a splash of water. Cook for a further five minutes until the carrots are soft but not mushy
The addition of some cashew or raw skinned peanuts makes this a more substantial dish. Add them with the carrots.
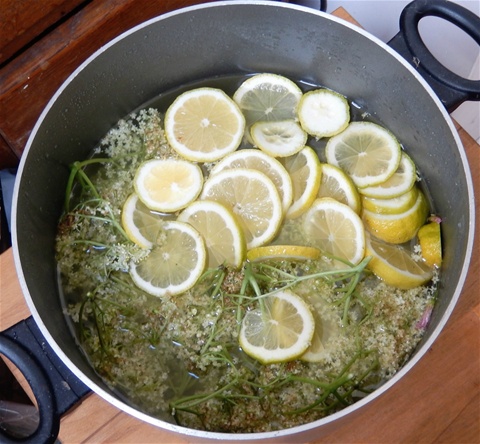
The first batch of cordial smells promising
June
Elderflower Cordial
This just smells of Summer, and is so easy to make! Pick the flowers when they are dry, and the pollen is still visible, make sure you don't include any insects, and you can't go wrong! This is based on Mary Berry's recipe, and the inclusion of the Campden tablets (readily available on Ebay) means there is no possible fermentation, which is brilliant as the cordial will not fizz out when you open the bottles.
What you need:
1.5 kg caster sugar (but I used granulated and it was fine)
1.5 l water
2 lemons
25 elderflower heads
50g citric acid (try Amazon as it didn't seem to be available in supermarkets or our pharmacies)
2 Campden tablets
What to do:
1. Put the water and sugar in a large non-stick pan and bring to the boil, stirring to dissolve the sugar. Leave to cool.
2. Scrub the lemons and slice thinly. Add to cold syrup, with the elderflowers, citric acid and crushed Campden tablets ( I put them on a tablespoon and squashed them with a teaspoon... they crush very easily. Just be careful not to breathe in any smell from them as you stir the mixture the first time. After that it is fine)
3.Cover, and leave overnight, or up to three days, in a cool place. Doesn't need to be in the fridge really
4. Sieve the mixture into a large sterile bowl, and then pour the syrup through sterlised muslin or a jelly bag back into the pan.
5. Using a sterilised funnel, pour into sterilised bottles and put on their lids
6. This keeps in the fridge for up to three months.
NB I sterlise all the bottles and other equipment, including the jelly bag, before I start by putting them through the dishwasher on a hot wash
To use: Dilute with water or fizzy water to drink. Mint or cucumber goes well too!

Strawberries and redcurrants are used here, but you can use any fruit you have, even chopped apple rolled in a little lemon juice to make sure it does not go brown, with a garnish of mint
Elderflower Posset:
Once you have the cordial, this posset is a wonderful, simple way to use it, although you can use shop-bought cordial of any flavour instead. Fruit juice does not work though as it hasn't enough sugar.
This is also based on Mary Berry's recipe.. if it ain't broke, don't try to fix it!!
What you need:
300ml pouring double cream, not the extra thick one
300ml undiluted elderflower cordial
Fresh berries to decorate and icing suger to sift over
What to do:
1. Whip cream to the soft peak stage, and the gradually pour in the cordial, whisking slowly until combined
2.Freeze in pretty cups, martini glasses or anything that you think looks the part, for at least three hours, preferably overnight
To serve: Allow to soften in the fridge for about 20 minutes, then decorate with Summer fruits and sift a smidgeon of icing sugar over the top.
[This can also be frozen in a plastic box, and then scooped out into quenelles to serve]
Rhubarb harvest in May
May
Rhubarb Crumble (serves six)
This is the simplest recipe, with gorgeously juicy, jammy results. Always good to feed a lot of people, especially on those chilly days that May still brings.
What you need:
Filling:
700g rhubarb, wiped and chopped into pieces about 2cm long
Knob of butter
1tbp lemon juice
4 tbps golden caster or granulated sugar
Topping:
400g plain flour
200g cold butter cut into cubes
200g golden caster or granulated sugar
pinch of salt
Granulated sugar to sprinkle --about 2 tbsp
generous handful of coconut chips or desicated coconut (optional)
What to do:
1. Preheat the oven to 180°C/Gas 4
2. Put flour and salt in a large mixing bowl and rub in the butter until it is evenly incorporated and the mixtures is a bit like crumbs. Stir in sugar, and the coconut if using.
3. Grease a pie dish with the remaining knob of butter, put in the rhubarb, lemon juice and sugar and mix together with your hands unitl sugar is evenly distributed
4. Put the crumble mixture on top of the rhubarb, and pat down. If there is a lot, you can pile it up a bit in the middle.
6. Sprinkle the extra granulated sugar on top
7. Put in oven and cook for 35-40 minutes, when the topping will be light gold and the rhubarb juices bubbling at the edges.
To serve: Warm custard, or double cream
Red rhubarb gives a better colour than green
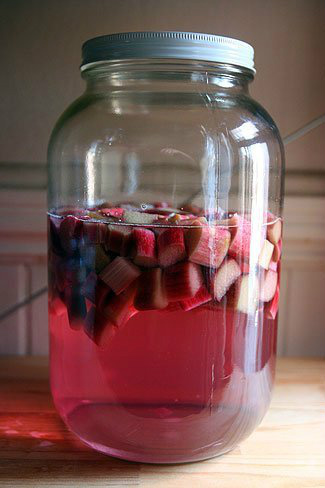
Rhubarb Vodka
You can vary the flavour with the addition of half a vanilla pod (Rhubarb and Custard Vodka), strips of orange peel (Rhubarb and Orange Vodka) or warming spices such as cloves and cinnamon sticks (Christmas Rhubarb Vodka) etc
What you need:
3-4 sticks of rhubarb, wiped and cut into 2cm pieces
200g white caster sugar
1l of vodka.. even the cheapest gives a good result
What to do:
1. Put the vodka and sugar in a large scew top jar, add the vodka (plus any additional flavourings) and shake to dissolve the sugar. Don't worry if it does not all dissolve, as it will over the next few days.
2. Keep the jar in a cool, dark place the shake regularly.
3. The flavour intensifies the longer it is left, so after a month, taste to see if you want to bottle it or leave it longer. If you feel it needs to be sweeter, you can add a little more sugar.I usually leave it about 3-4 months.
5. Strain out the rhubarb - which you can use for a crumble or other pudding) - and then thoroughly strain using a jelly bag to ensure the liquid is clear
6. Pour into clean bottles. It does not use to be kept in the fridge, and stores for at least a year.
To serve: Neat in shot glasses, as the basis for a long drink with tonic water or soda water, with or without ice.

Luscious Apricot Almond cake, which sunk in the middle as it cooled!
April
Apricot Almond Cake
If you use gluten free baking powder, this cake is suitable for anyone who needs to avoid gluten. It is very moist and usually collapses in the middle as it cools, but filling it with creme fraiche in this way means it does not really matter. If yours stays in shape, then you can serve the creme fraiche on the side. I have also used the same recipe without adding the apricots, and sliced the cake in half when cold nd filled it with conserve of violets. It did need eating with a spoon!
What you need:
A 20cm cake tin, oiled and lined with greaseproof paper
350g ground almonds
2 tsp baking powder
3 large eggs
200ml runny honey
200ml olive oil ( extra virgin gives a good flaavour, but any will do really)
16 dried apricots
a further 4 tbs of honey, mixed with 4 tbps boiling water and a tbp lemon juice
To serve: creme fraiche and snipped apricots
What to do:
1. Put the apricots in to soak, using the second lot of honey mixed with boiing water and lemon juice. Leave for about an hour
2. Heat the oven to 160°C and line the tin
3. Put the dry ingredients in a bowl and mix together
4. In another bowl whisk the eggs, olive oil and honey together
5. Pour into the dry ingredients and mix well
6. Pour into the cake tin
7. Drain the apricots (keep the soaking liquid) and put carefully onto the cake. Don't worry if they sink
8. Cook the cake for 45 minutes. If it is still wobbly give it a further five minutes.
9. Poke tiny holes in the top of the cake with a cocktail stick and carefully ladle the soaking liquid onto the cake a little at a time.
10. Leave the cake to cool completely before taking it out of the tin. I put it on the plate upside down yesterday, as the apricots had sunk to the bottom, and it looked better this way up.
11. If the middle has sunk, fill it with creme fraiche and decorate with some snipped apricots.
March
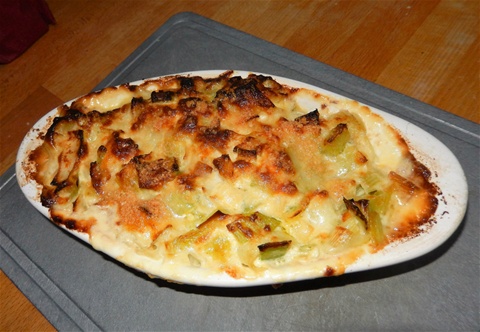
Parmesan Leek Bake
We do grow a lot of leeks, and this is one of our favourite ways of using them to accompany roast dinner.This amount serves two generously or three who are not so hungry.
What you need:
2 large fat leeks, cleaned and sliced in half and cut into rings about 1cm thick
2 tbs double cream
Large knob of butter
1 tbs sunflower oil
2 heaped tbs finely grated parmesan
What to do:
1. Soften the leeks in a frying pan, in the butter and oil
2. When translucent, stir in the cream and half the parmesan, Pour into an oven-proof dish
3. Sprinkle the remaining parmesan over the top and bake at Gas 6 /200°C for 20 minutes or until just browned
4. Allow to cool slightly before serving, as it will be very hot indeed.
You can replace the parmesan with cheddar, or add grated nutmeg or thyme to the leek mixture before baking without any cheese.
Wild Garlic Pesto
This stores well in the fridge, and as long as you cover what is left with more oil, will keep for months. Delicious stirred into freshly cooked pasta, as a real taste of Springtime
What you need:
100g wild garlic leaves
50 g grated parmesan cheese
50
g pine nuts
1/4 tsp salt
1/4 tsp pepper
100 ml olive oil + some more for topping up the jar
What to do:
1. Wash the wild garlic leaves and dry them carefully. If they are wet the pesto may not store so well
2.
Grind the pine nuts in a food processor, and add cheese, salt and pepper
3. Add about ½ of the wild garlic leaves and blend
4. Add the rest of the leaves, plus the olive oil, and blend until thick and even
5.
Put in a sterilised jar, and top up with olive oil so that the pesto is covered
6. Screw on lid and store in fridge for up to six months (see note at top)
If the taste is too strong, or you are short of wild garlic leaves, you can use fresh parsley to partly replace the leaves.
Taste of Summer Loaf Cake
February
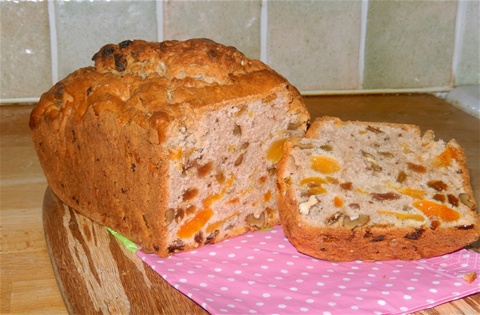
Taste of Summer Loaf Cake
This must be the easiest cake in the whole world to make, and in the dark damp days of Winter is just what is needed to bring a little glow. The cup measurement is just a modest sized mug, nothing special at all. I saw a similar recipe on an American website once and it reminded me of the boiled fruit cake I used to make, and after a bit of fiddling about, this is it:
What you need: (Loaf tin 18cm by 5cm by 8cm deep. Greaseproof to line the tin)
½ cup golden caster sugar
1½ cups dried fruit (I used two thirds apricots chopped up and one third green raisins this time)
½ cup roughly chopped walnuts (optional)
250g very soft butter
250 ml boiling water
2 cups of SR flour
2 eggs, lightly beaten
What to do:
1, Preheat the oven to 170°C
2. Put the sugar, fruit, nuts and butter in a large mixing bowl and add boiling water
3. Stir in flour and beaten eggs. Make sure you incorporate all the dry flour, as it can stick in the nuts a bit
4. Pour mix into the lined loaf tin and bake for 40-45 minutes. It is done when a sharp knife or skewer pushed into the middle comes out with no raw cake mix on it. There might be apricot smears on it but this is OK.
5. Leave in tin for 15 minutes before turning out onto a rack to cool, and peeling off the paper.
Gorgeous slightly warm with butter, but keeps well in a cake tin if there is enough left.
Made another one, using a cup of chopped, dried pears and a cup of coconut chips in place of the fruit and nuts, plus 2 tsp of powdered ginger ( 3 would have been even better I think) It did take longer to cook for some reason so covered the top with foil to stop it getting too brown.
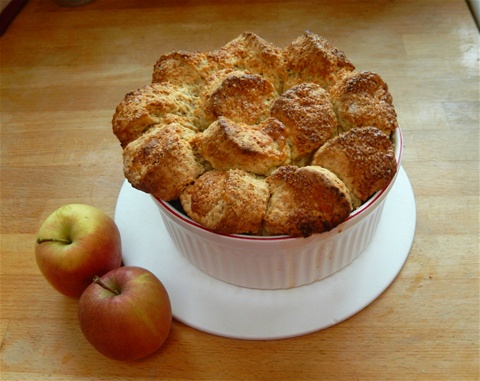
Apple & Pear Cobbler
January
Borlotti Bean Cassoulet (to feed 4)
This is a thick, hearty meal with hardly any effort whatsoever. The beans swell up to be nearly as big as marbles, and are delicious. I have not used other beans such as Cherokee Trail of Tears, but there seems no reason why they could not be substituted. Smaller beans may have a shorter cooking time of course, but the ten minute boil is important to remove any toxins
What you need:
8oz dried Borlotti beans
8 fat meaty sausages, browned in 1 tbsp oil
3 big onions (I used huge red ones) peeled and sliced fairly finely
6 cloves garlic, peeled and chopped
1 level tsp smoked paprika
1tbsp fresh thyme leaves
1tbp fresh oregano leaves, or use ½ tbsp rosemary finely chopped
3 whole bay leaves
3 tbsp tomato puree
salt & pepper to taste
1½ pints of hot water or chicken stock
What to do: (Start the day before)
1. Put the beans in a saucepan with plenty of plain water, bring to the boil and boil for 10 minutes. Take off the heat and leave them overnight in the water.
2. Turn on the oven - 140°C
3. Brown the sausages and put in a large overproof casserole dish.
4. Slowly cook the onions in the same frying pan, adding more oil as required, until the are very soft and not quite caramelised: takes 10-15 minutes.
5. Drain and rinse the beans and add to the dish.
6.Stir the tomato puree into the hot stock/water and pour into the dish
7. Stir in the other ingredients and seal the top tightly with foil
8. Put in the oven for 3 hours. If the sauce is too runny at this point, take off the foil and put the dish back into the oven for a further half hour.
Serve with: plain rice, decent bread or just serve in a bowl to eat with a spoon.
Apple & Pear Cobbler (5-6 portions)
A very filling pudding which goes down well when the weather is grey and damp outside
Turn on oven (Gas 200°C) and get out a 1.5l dish to cook it in, before you start.
What you need:
Around 1kg of peeling and sliced apples and pears. I used a mixture of cooking and eating apples from the store, but the pears were from the market. I have made this before with black berries from the freezer added, but it is best to thaw these first and drain them
600g golden caster sugar
6 whole cloves
450g SR flour plus 1 level tsp baking powder
half tsp powdered ginger
half tsp ground cinnamon
pinch of salt
200g cold butter, diced
100g golden caster sugar
70ml milk
1 large egg
1 level tbp golden granulated sugar (optional)
1. Mix sliced fruit and sugar and pile in baking dish with the cloves.
2. Put flour, spices and salt in large mixing bowl and rub in flour
3. Mix up egg and milk in a small jug, and add all except a teaspoonful to the dry mix. Bring together together ( I used a large knife) Add extra milk if needed.
4. Turn out onto a silicone baking sheet or a hard worktop and knead gently to a soft dough. Roll out 1.5 - 2 cm thick, using some extra flour for dusting.
5. Cut out enough scones to cover fruit, slightly overlapping - mine were 7cm across and I needed nine. Cut any remaining dough into scones to cooke separately.
6. Brush tops of scones with egg & milk. Sprinkle top of ones on the fruit with golden granulated sugar if you like this.
7. Put in oven for 12 minutes (any extra scones will be cooked then so take them out of the oven) and then reduce heat to 140°C for a further 20-25 minutes. Top should be golden brown and fruit bubbling
Serve with vanilla icecream, custard or cream

Kitty's Winter Soup
Kitty's Winter Soup
We made this today, from what we had at the plot, and managed to use up all those tiddly fiddly carrots and parsnips that get left until last! Surprising how adept a six year old can be with a knife: after doing an excellent job in scrubbing them, she chopped them all up.... Mr Skinny Legs and Mrs Crazy Legs the parsnip twins were duly despatched to the pot.
The kale garnish is delicious and really lifts the soup.
What you need:
Quantities are approximate and can be varied according to what you have: it will still taste good.
10 small parsnips
5 carrots
6 leeks
7 small potatoes (These were in cold storage in the fridge in the garage so they wouldn't sprout)
2½l chicken stock
3 black kale leaves, vein removed and chopped finely
ground black peppercorns, caraway seeds and salt, to taste
What to do:
1. Scrub the carrots and parsnips - no need to peel - and cut off any bits that look dodgy. Chop into pieces about 2cm square
2. Clean the leeks and slice about 1cm thick
3. Peel potatoes and chop into 2cm pieces
4. Put all vegetables in a large pan with the stock, bring to boil and cook on half boil for 40 minutes
5. Fry the kale and put on kitchen paper to drain
6. When vegetables are soft, blend up. Add hot water to thin if needed, and add salt and
pepper to taste, plus caraway seeds if you like these.
7. Ladle into bowls to serve, with a swirl of cream (1 tsp only) and kale as a garnish.
(Pretty good with Cheesy Breadsticks, made from a packet of white bread mix with grated cheddar incorporated when kneading and also added to the top before proving - cook on 210°C for approximately 15 minutes, less if yours are very skinny. Grease the tray well as the cheese seems to make them stick more than usual)
Holly Hooper
Your Fried Chicken looks amazing! Wishing you and your family a bountiful Thanksgiving and thanks so much for sharing with Full Plate Thursday!
<a href="https://bestdarkwebmarketslinks.com/">Holly Hoo
Guy Simon Scudamore
Thank you for the refreshing blog.
Kathy
Your kind comment is much appreciated: thank you!