July 2019
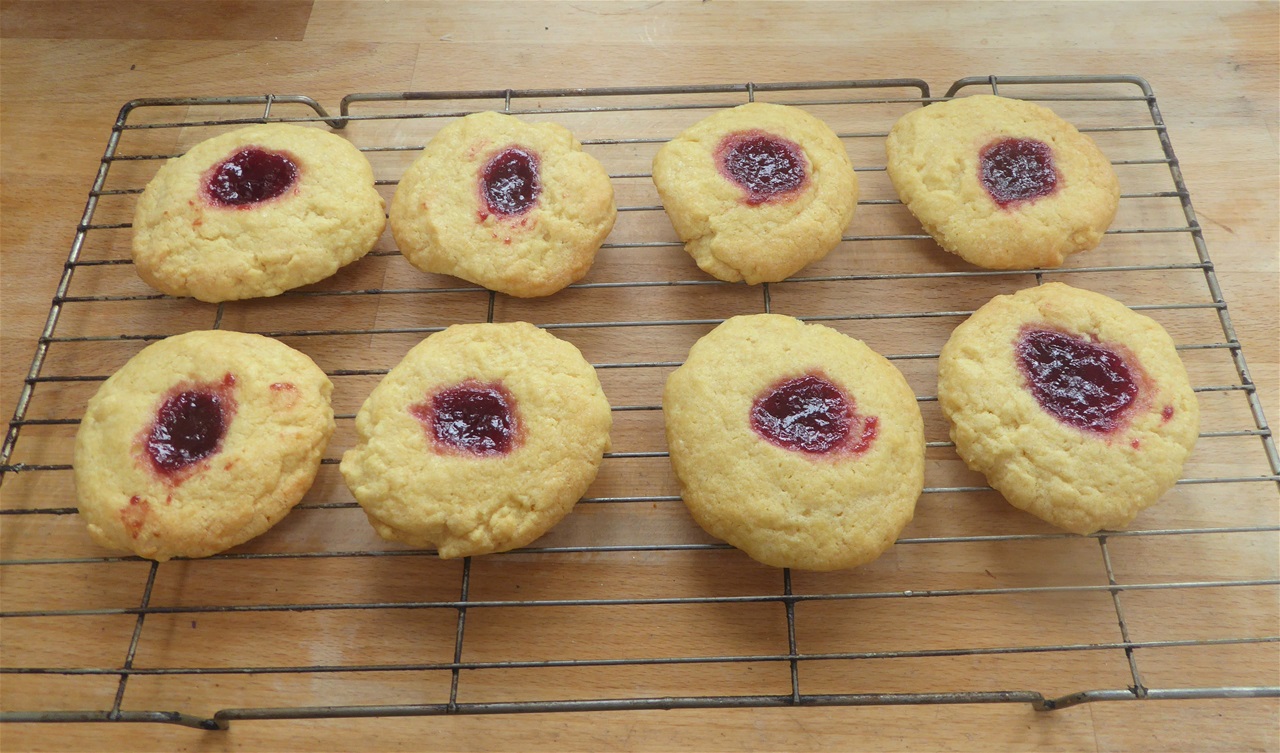
15th July - Thumbprint Biscuits (makes 18-20... only half the batch is shown in the photo)
I hadn't made these for many years, but they used to be a "go-to" for something quick, easy and delicious when there were unexpected extra people (usually children!) in the house. As soon as my friend Jane tried one, she said they were just like the ones she used to make from the Usborne Book of Children's Cookery... which is where I got my original recipe ... but she cannot find her copy. So having had several requests now for the way to make these, including from my Sister-in-Law (whose, she told me, came out quite different but still delicious, and my grandaughter Pearl, here is the step by step version of how to make them
You can of course use any jam you like, or indeed lemon curd or marmalade, and the dough can be flavoured with whatever you feel will complement the filllng... my next batch will be apple sauce and cinnamon.. but here is the original raspberry jam and vanilla version:
Raspberry Jam Thumbprint Biscuits
What you need:
200g butter
200g caster sugar
1 large egg (if you have a medium size egg then you will also need 2 tsp cold water)
320g plain flour
1 tsp vanilla essence
½ tsp salt
½ tsp baking powder
raspberry jam (about 10 tsp)

Dough ready to form into a ball
What to do:
I always try to use the minimum amount of equipment as it makes cleaing up afterwards so much quicker, so I weigh/measure all ingredients straigth into my mixing bowl where possible
1. Turn the oven to 180C (slightly lower for a fan oven)
2. Prepare two large baking trays. I use silicon baking sheets inside the trays, which last for years and are totally non-stick, but if you do not have these, silicon baking paper is the next best thing
3. Put your large mixing bowl onto the scales and tare (set) to zero. Do this every time you put the bowl back onto the scales to add another ingredient that needs weighing
4. Put the butter into the bowl and then microwave on medium (700w) for 25 seconds when it wil be very soft but not completely melted
5. Put the bowl back on the scales and add the sugar
6. Using a large spoon, beat the butter and sugar together until it is light and fluffy, and pale coloured. This will take about two minutes. You can of course using a mixer but it adds to the washing up and tbh this is very quick to do by hand
7. Now add the egg and vanilla, and mix in thoroughly, plus the water if you are using a medium sized egg)
8. Back to the scales, weigh in the flour, then add the salt and baking powder
9. With the same spoon, mix thoroughly until there is no free flour visible and it forms a rough dough
10. Using your hand, form the dough into a ball. It does not have to be perfectly round, just all pushed together. It is easier to do this if your hand is wet because the dough does not stick to your skin so much
-
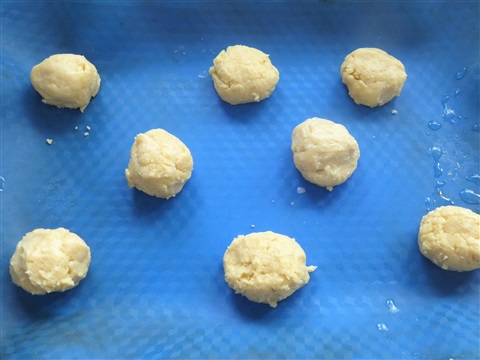
10. With wet hands, make balls of dough about the size of an egg and put them on the baking tray, leaving space for them to spread out as they cook. You will have about 18-20 balls
-
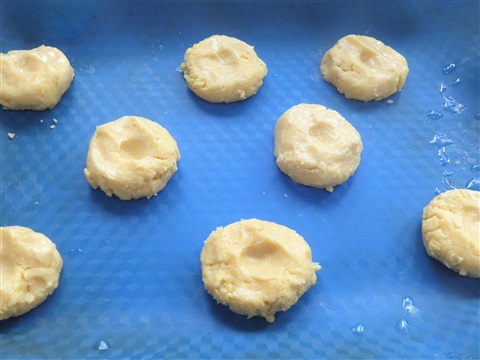
11. Squash them down gently until about 1cm thick and make a dent in the top with your thumb, Make sure it does not go through the bottom of the dough
-
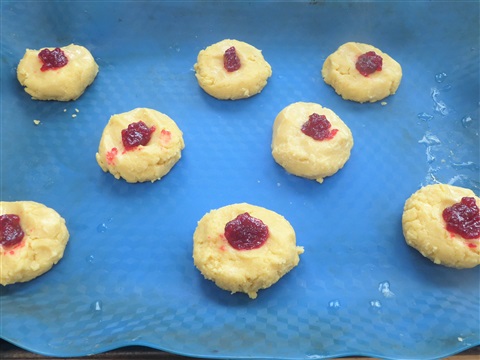
12. Fill each dent with about half a teaspoon of jam, easing it off the spoon with your finger. Try to keep the blobs neatly in the hole but a little bit on the dough is fine
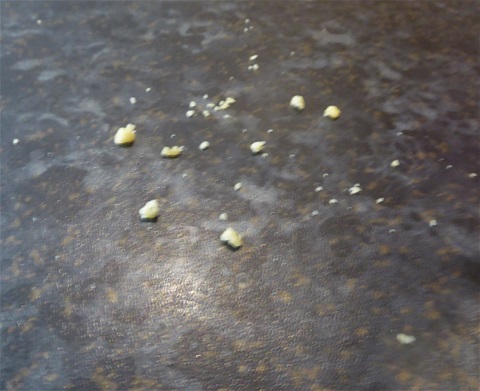
Here is Pearl's contribution to the end result later in the day... crumbs!!
13. Now put the trays in the pre-heated oven and bake for 12-15 minutes. They will be pale gold when cooked and the jam will be bubbling a little bit. The jam is very hot!
14. Take the trays out and use a spatula to transfer the biscuits to a wire cake rack to cool. You may need two racks. If you do have to stack them, make sure the jammy centre of the lower layer isn't covered by another biscuit or they may stick together
I hope the photos help novice bakers to feel confident enough to make these. They really are very quick. I had these ni the oven within 10 minutes but didn't spend too long neatly shaping them, as you can see (!) so perhaps 15 minutes is more realistic if you have not done a lot of baking before.
The biscuits keep well in an airtight box or cake tin for at leas three days but usually they are eaten well before that!
January 2019
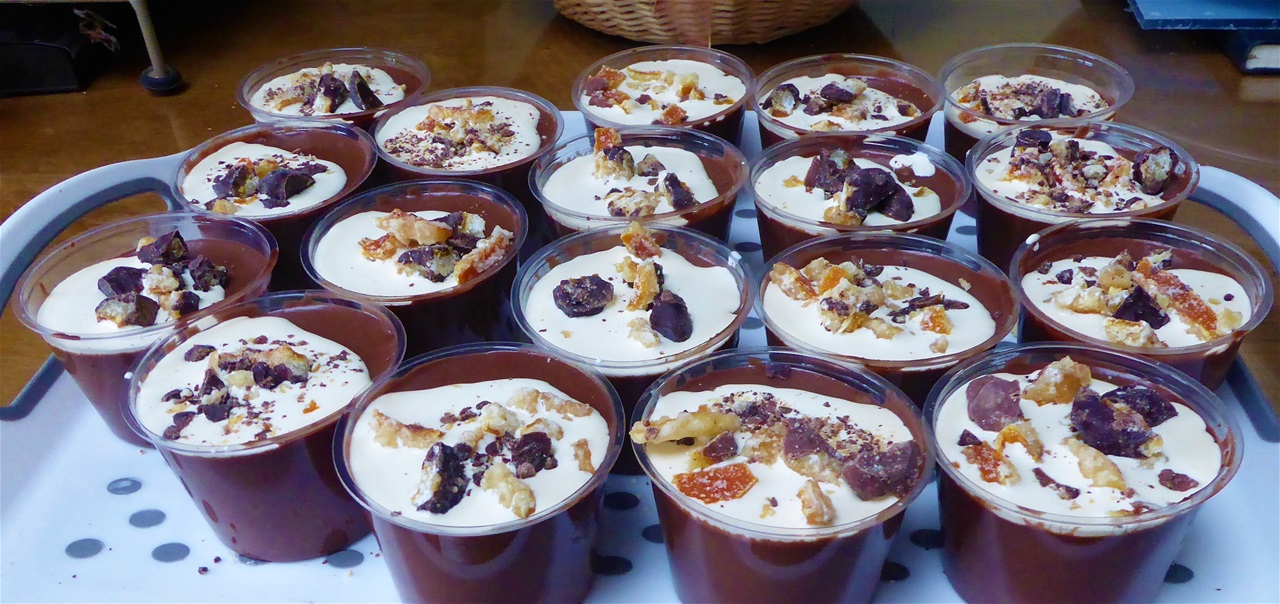
2nd January - Chocolate Chestnut Pots
I saw a picture of these, undecorated, a couple of weeks back, and even plain, they looked luscious. They would be perfect for our New Year family feast. I wanted to make them look a little more special though, so used some of the candied orange peel as a topping. The pudding is rich and velvety, and I can hardly believe how easy these were to make. I used a recipe from Nigella Lawson as a starting point, missing out the alcohol as children would be eating this.
100ml cups (compostable ones, which was a bonus) were just right for individual servings, and the quantity I made filled 18 of these. However, I am giving quantities to make 6, as it is a much more likely amount to make really
What you need:
125 ml double cream
125 ml full fat milk
175g dark chocolate, the darker the better
1 large egg
250g chestnut puree ( I bought this in a pouch: Merchant Gourmet brand)
3 level tbsp caster sugar
a further 6 tbsp double cream for topping
6-8 pieces of candied orange peel strips, previously dipped in dark chocolate, although plain will be good too
What to do:
1. Heat the milk and cream together in a saucepan, until nearly boiling
2. Add the sugar and stir until there are no crystals left. Turn off the heat
3. Break up the chocolate and put it in a food processor, blitzing it until broken into small pieces
4. Pour the hot cream into the processor and leave for 30 seconds
5. Turn on the processor for 45 seconds to blend the chocolate into the cream
6. Now add the chestnut puree and the egg, procesing until completely smooth. (This took nearly five minutes)
7. Now ladle the mixture into the serving cups, and leave in the fridge to set. (I left them overnight)
8. Roughly chop the candied orange peel. I had dipped the ends in dark chocolate when I made it, but plain will still be very good
9. Carefully pour 1tbsp of cream onto the surface of each pot of chocolate, and sprinkle on the chopped orange peel
And that is that! I said it was easy but goodness me, it is rich and deeply chocolately. There is no hint of chestnut flavour, but it provides a wonderful texture. They do keep for aday or two in the fridge too... what's not to like?
Latest comments
I never had much luck growing plums, and yours look lovely! I do hope you get a break from your heat wave, and some rain.
If those tall green plants are mugwort then they're certainly different from mine which are perhaps a foot tall with white spotted leaves and pink or blue flowers.
Maybe make some sleeves for your tree? Still be enough for the birds but then you can get them fully ripened
Nice to read a local (ish) blog. Interesting bit about cherries. We have a huge sweet cherry tree. Every few years there are enough for birds and us. Had a few this year, fully black when properly rip