Preserves September 2019
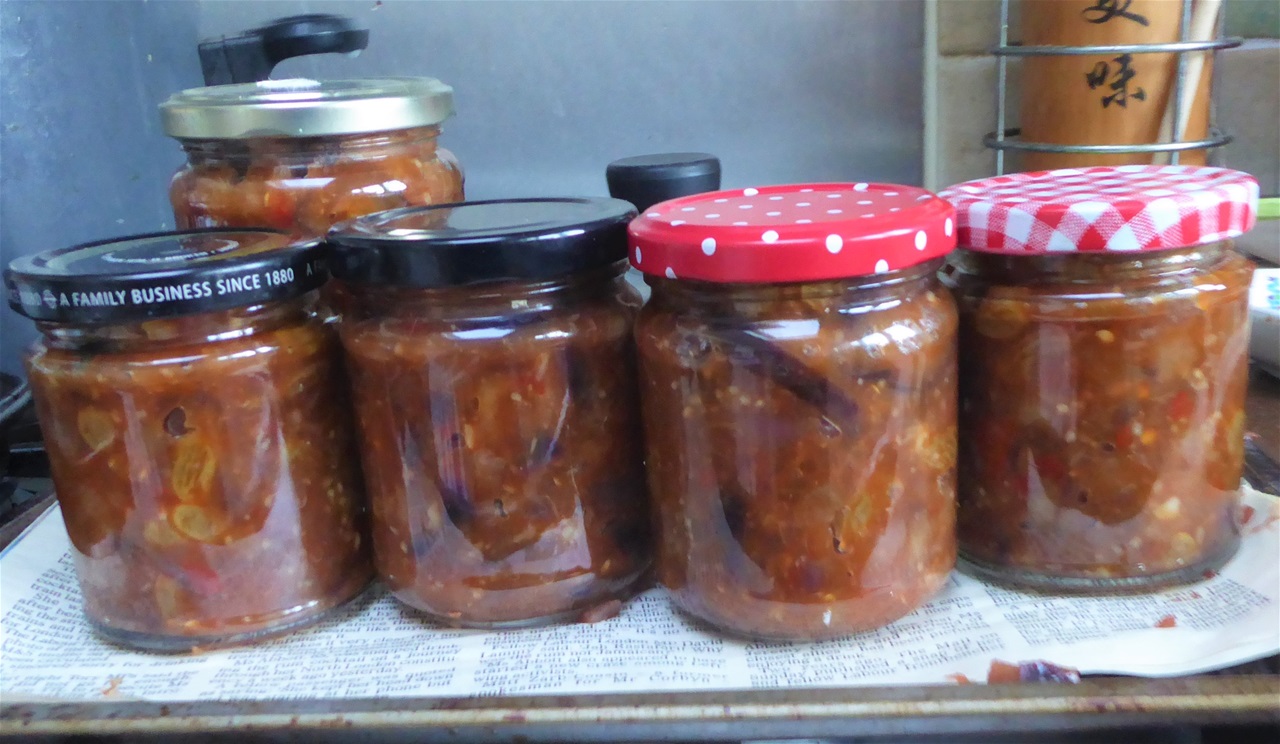
Aubergine Chutney (Indian Style)
This is a bit of a family favourite, so even when there is a crop failure in the Aubergine department, I still make this, using some bought aubergines from the local Asian market. This year however, I have been blessed with a kilo or two, so can use home grown ones. It is as hot and spicy as you choose to make it. I have gone for fairly mild as a starting point, and you can add more chillies or even chilli powder if you'd like to.
I mainly use it as an accompaniment to curries, either with rice or with chappatis; it is equally good in a cheese sandwich though!
What you need:
1kg of aubergines
120g raisins
250 ml white wine vinegar
200 g soft light brown sugar (dark brown gives a different flavour but it can be used)
3 tbsp sunflower oil
2 medium onions, skinned and chopped
1 tbsp ready minced ginger... I buy this in our local store. You can peel and mince a piece about 3cm long if you prefer to use fresh
2 tsp garlic puree
1 level tbsp ground cumin
1 tsp cumin seeds
2 bay leaves
4 tbsp tomato puree
2 level tbsp mustard seeds, either yellow or black whichever you have (I used yellow)
2 fresh red chillies of medium heat ...adjust the quantity and type to your taste. MINce these, remove the seeds if you want it really mild
What to do:
1. Sterilise the jars and keep warm ( I put them in the oven for 15 mins on 150C, and put the lids into boiling water)
2. Put the oil in a wide pan, add the chopped onions and cook gently until soft.. about 10 minutes
3. Add the ginger, garlic and minced chilli, and cook for 2 minutes
4. Add all the spices, including the cumin powder and bay leaves, and cook until the mustard seeds start popping.
5.Put in the aubergines, vinegar, raisins and tomato puree
6.Heat genty, stirring to make sure the sugar dissolves, then bring up the heat to simmer for 15-20 minutes until the mixture is thick and the aubergine is very soft. If the aubergine needs further cooking, add 2tbsp hot water and keep an eye on it to make sure the mixture at the bottom does not burn
7. Leave to cool for 5 minutes, then ladle into the prepared jars, wipe the rims and put on the lids. If you can spot the bay leaves, take them out
I find the flavour mellows after a month and is less vinegary. It does keep for several months in a cool place, and my previous batch is still good a year later.
Preserves September 2018
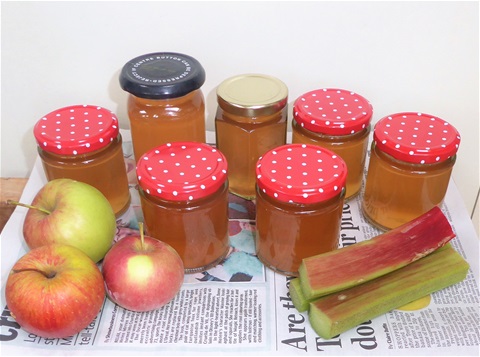
Rhubarb & Apple Jelly
Rhubarb & Apple Jelly
This is a slightly sharp jelly, well suited to accompanying cold meats, or cheeses. We picked some rhubarb for the local Show (had 2nd place with it) and I have struggled to think of something to use it for, because somehow to me, rhubarb is linked to the first fresh fruit of the season in Spring. However, after the success of the lavender flavoured jelly, I thought I'd see how a rhubarb one came out. Our rhubarb is a variety with stems mainly green in colour, hence the golden colour of the jelly, but if yours is a redder variety, the end result would be pinker, I'm sure.
It is the volume of juice you end up with after cooking the fruit that determines the weight of sugar, hence the rather vague quantities gven below
What you need:(Makes about 6 x half pound jars)
Roughly equal quantities of chopped up apples and rhubarb, to make around 4kg of fruit ( See note above)
White granulated sugar: 450g to 600ml of juice
Cold water to cover fruit
What to do:
1. Cut up the fruit into pieces roughly 3cm in size, making sure to include the apple skins and cores, which provide pectic to help the jelly set, especially as rhubarb has little natural pectin
2. Put the fruit in ta large preserving pan, with anough cold water to cover, and bring to the boil
3. Boil for 45 minutes and leave to cool for 15 minutes.
4. Set up your jelly bag and bowl (See theApple & Lavender Jelly Recipe for details if this is new to you)
5. Ladle the cooked fruit into the bag and leave to drip overnight
6. Next day, sterilise your jars and keep warm in the oven, and pour boiling water over the lids, in a small bowl
7. Measure the volume of juice, pour it into the preserving pan and add sugar: 450g per 600ml of juice (Volume of juice divided by 600, multiplied by 450 gives the weight needed)
8. Heat the juice and stir gently to dissolve the sugar, then bring to the boil
9. Boil without stirring, until a soft set is reached 104C, (or check a teaspoonful on a cold plate) If it is not ready, boil for a further 3 minutes and try again
10. Allow to cool for a couple of minutes and scoop off any froth, which will be semi-solid, with a slotted spoon
11. Take the jars out of the oven, dry the lids and leave for no more than five minutes to cool. Do not stir the jelly
12. Ladle the jelly into the jars, filling to the shoulder, wipe the edges of the jar mouths and put on the lid.
Once you have made jelly like this, using apples as the base to ensure it sets, you can vary the fruit that accompanies the apple or flavour the juice by steeping herbs in it before adding the sugar and boiling. Last year I made a sage and garlic jelly in this way, which was delicious, and I quite fancy a tarragon one
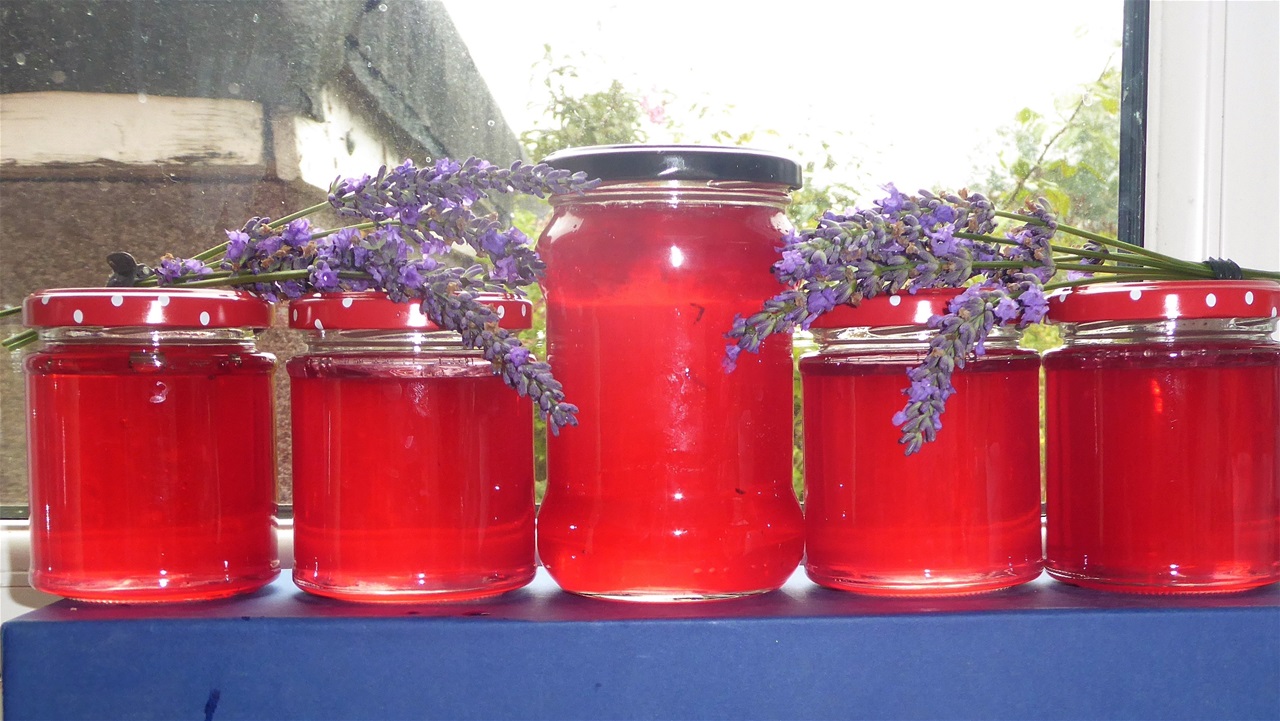
Apple & Lavender Jelly
I made some of this last year, and more by luck than judgement, had a beautiful amber coloured jelly with a light, fresh flavour, and the first small batch this year was similar, good enough to win a First at our local Show too. However, when I looked at the apple juice this time , it was slightly greenish and I wasn't too sure what colour the jelly would be, so I added some edible colouring I have used for baking. Wow, did it end up bright, so I guess I overdid it somewhat
Using lavender as an ingredient in anything does run the risk of the end result either tasting of perfume, or slightly medicinal, so I have refined the method to try to control this more.
Be aware this recipe is in two stages, and dripping out the apple juice takes several hours: i leave it overnight. Boiling out the jelly can be done the next day. Although this method looks long, it really is relatively quick and very straightforward, so don't let the length of the instructions put you off... I have given a lot of detail in case you have never made this type of jelly before
What you need: (makes enough for 6 x small jars)
4-5 lb of apples
10 lavender heads, ones that feel slightly oily when you rub the flowers through your fingers
white granulated sugar: 1kg per 1l of apple juice , once "dripped"
Food colouring if you'd like to use it... not essential
What to do:
1. Roughly chop the apples. The peels and cores contain a lot of pectin, so do not peel them at all, chop them from whole, cores and all, just removing any brown parts or evidence of damage from caterpillars . This is a good way of using windfalls, and why the weight of apples needed is so imprecise..depends how much you cut out
2. Put the apples in a large preserving pan, and add enough cold water to cover the fruit. Bring to the boil
3. Simmer for 45 minutes, by which time the apples should be very soft. If not, give them another 15 minutes
4. Turn off the heat and crush the fruit lightly with the back of your spoon: you are trying to extract juice but not make a fine puree
5. Allow to cool for half an hour. Spend this time setting up your jelly bag with a bowl underneath it. I have one with a metal tripod stand now, but I used to hang it off a broom handle across the seat of a chair, weghted down by heavy books. Putting newspaper under the bowl is a good idea ... I always manage to splash some juice when ladliing it into the bag, and it saves a mess on the floor
6. Now carefully ladle the contents of the pan into the jelly bag. Leave it for around 8 hours to drip, or overnight
7. Next morning, sterilise your jars in the oven and keep them warm. Pour boiling water over the lids, in a small bowl
8. Take the bowl away from under the jelly bag before moving the bag... saves accidentally dropping apple flesh into your carefully strained juice!
9. I usually discard the pulp, but some people use it to make something out of... I have quite enough produce to deal with without adding this puree to the list, but I thought I should just mention the possibility
10. Measure the volume of juice, and pour it carefully into the preserving pan
11. Add the sugar: 1 kg to 1l of juice
12. Warm slowly, stirring until the sugar is dissolved,and then add your lavender flowers, whole.
13. Bring to the boil. Turn off the heat and leave for 20-30 minutes. Taste after 20 minutes to check the level of flavouring. Add food colouring at this point if you want to... a very tiny bit!
14. Remove the flower heads with a slotted spoon, then bring the liquid to a boil. If there are any tiny pieces of flower in the jelly, it looks quite nice actually, but if you want to, remove them with a small spoon. Do not burn yourself, the jelly is very, very hot
15. Boil until setting point is reached. There will probably be scum/froth form. Do not stir this in or even touch it yet. It is formed from the waxiness of the apple skins and is not harmful, but you do not want it to cloud your jelly
16. I remembered I had a jam thermometer in the drawer, so boiled until the temperature was 103-104C, which is a gentle set. You can test for set using a small amount on a cold saucer though, as I often do
17 Turn off the heat. Take your your jars from the oven
18. Now is the moment to gently lift off that scum. It should be all together against the side of the pan, and you can carefuly edge a slotted spoon under it and take it out. If there are small pieces that escape, use a teaspoon to catch them. Do not stir the jelly now
19. Ladle the jelly into the jars, filling to the shoulder. Carefully wipe off any spillage from the necks of the jars and put on the (dried) lids. Leave them to set, being very careful if you need to move them before then.
And there! You should have crystal clear, softly set jelly, to serve with scones and cream, use to fill a sponge cake or just eat on toast. It will keep for over a year in a cool, dark place, and I love being able to go out to the garage and come back with something so summery when there is snow on the ground
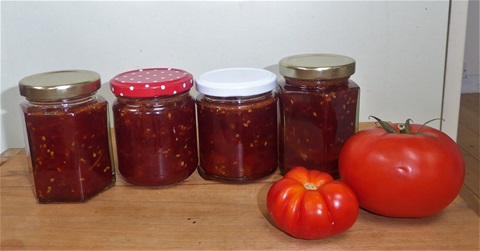
Chunky Tomato Ketchup
Chunky Tomato Ketchup
I can't find the mouli our daughter bought me, so decided to try to re-create the flavour of home made ketchup in a chunkier form as I couldn't face pushing the whole mix through a sieve. I daresay it will turn up when the main preserving season is over... that's usually how things go! We tried some with last night's dinner, and it was pretty good, so good in fact I shall make another batch when the next lot of tomatoes are ready. It really is simplicity itself
What you need: (This fills 4 x half pound jars)
5 cups of tomatoes, skinned and chopped into pieces about 2cm across
5 cups of white granulated sugar (brown sugar will give a different colour and flavour but I feel sure would be fine)
large pinch of ground allspice (You can use cinnamon if you don't have allspice)
1 lemon, sliced very thinly, pips removed
2 tbsp butter (may not be needed, see No 4 below)
What to do:
1. Sterilise your jars and lids and keep the jars warm in the oven
2. Put all the ingredients except the butter into a preserving pan and bring to the boil
3,. Cook on a medium heat for 45 minutes, when it should be thick enough to just drip off the spoon but not at as thick as jam would be
4. If there is foam on the mixture, stir in the butter to disperse this: given that the tomato skins were removed, it may not be necessary, but I wanted to offer a solution should this occur beacuse it does not look so appetising if there is foam set on the top of the ketchup in the jars
5. Allow to cool for five minutes, stir, and pour into the warm jars. Put on the lids: these can be tightened slightly when the jars have cooled
6. Label, and store in a cool dark place.
I included the lemon to increase the acidity, and it turned out to be a great addition, adding extra texture and another flavour dimension too. We ate some last night with burgers, and although it is a bit thick for dipping chips into, t could be made slightly thinner I guess. I can se it being rather good spread on hot cheese on toast, or in a cold chicken sandwich. A useful addition to our larder!
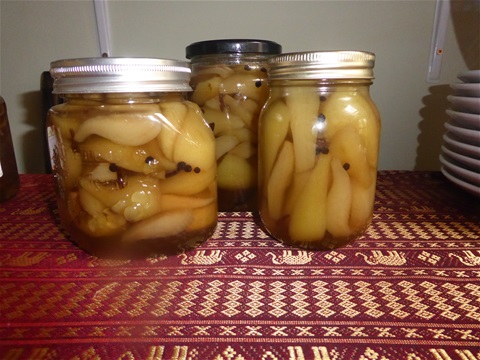
Spiced Pickled Pear
Spiced PIckled Pears ..Mum's Recipe
Mum used to make several jars of these every year, using windfall Perry Pears from a local fram. The fruit mainly fell into the adjoining ditch, filled with stinging nettles, so gathering them was always quite an experience. Come Christmas Day, the first jar would be ceremoniously opened, and my Dad would have the first taste. Usually they were sweet and perfumed, but occasionally mouth-puckeringly acerbic, but either way, they joined the roast turkey on the plate at lunchtime
What you need: (This makes 4 x 500ml jarsful)
2kg of pears, hard and not too large
1000ml cider vinegar or white wine vinegar
2kg white granulated sugar
6 slices of fresh ginger root, 2-3 ml thick
1 large cinnamon stick, roughly broken inoto 3 or 4 pieces
1 level tbsp black peppercorns
1 level tbsp whole cloves
What to do:
1. Sterilise the jars and keep warm in the oven; pour boiling water over the seals/lids in a small bowl and put aside
2. Put the vinegar and spices in the preserving pan
3. Peel and core the pears and slice into long quarters, putting them immediately in the vinegar to prevent them going brown. Move them about as you get more in the pan, to ensure they all get a coating of vinegar
4. Bring to the boil and simmer until the pears are just cooked through, still firm enough to hold their shapebut a fork will go through the flesh
5. Remove the pears with a slotted spoon, and put in a clean bowl. If some of the cloves also come out, you can stud these into slices of pear
6. Start to reduce the vinegar in the pan: you need a syrupy consistency to pour over the pears in the jars
7. Once the pears are cool enough to handle, pack them into the warm jars. I lay the jars on their sides and try to put the pears in, in such a way that they are more or less upright in the jars when finished, as I like them to look tidy, but sometimes the shape of the jar doesn't lend itself to this. The important thing is to pack them in tightly so they will not float about
8. Once the syrup is ready, remove the cinnamon sticks and ginger slices. You can push these in amongst the fruit if you like. The ginger will be luscious!
9. Pour the hot syrup over the pears, filling the jars to within a centimetre of the top. Carefull get rid of any airbubbles with a clean wooden skewer, Wwpe the edges of the jar and screw on the lids.
10. Once you have washed the outside of the jars (They can get sticky) and they are properly dry, label them and store them away in a cool dark place until you would like to eat them
You can eat them after about a week, but they keep for at least a year with no trouble. You can vary the spices of course. I used the for this batch as it is what my Mum did, but Star Anise or Cardamom would be good with the pears, so should there be more pears come my way, I shall give these others a go.

Orange Tomato Preserve
We have a large crop of Orange Banana and Yellow Sunrise tomatoes this year, and I have been trying to find another way of using these that shows off their colour. Last year I made Yellow Tomato Jam with Basil, which was very good indeed, and now here is a lemony, gingery preserve that will be good as a condiment. If you only have red tomatoes, you can of course use these instead
What you need: (This made four and a bit half pound jars)
1.5 kg yellow and orange tomatoes
500g white granulated sugar
2 lemons
a piece of fresh ginger about 8cm long
What to do:
1. Put jars in the oven to sterilise and keep warm (120C) lids in a small bowl with boiling water poured over them
2.Cut up the tomatoes, removing the hard green stalk area and any solid white sections inside to discard, and put them in your preserving pan
3. Add the sugar and stir to combine
4. Grate the lemon peel directly into the pan, remove and cut up the flesh (without pips) and then slice each remaining lemon shell into six pieces, before adding these to the pan as well. These will be removed at the end, and will add pectin during the cooking process to help the preserve set
5. Grate the ginger directly into the pan. There is no need to peel it first
6. Bring the mix to the boil, and continue to boil until setting point is reached. This took 35 mnutes, but it depends how juicy the tomatoes are, so keep an eye on it
7. Remove the pan from the heat, take the jars out of the oven.
8. Leave for five minutes, then take out the pieces of lemon shell to discard, then ladle the mixture ino the jars, filling to the shoulder
9. Wipe the edges of the jars. Dry and put on the lids, finger tight and leave to cool. You might find the lids need further tightening then
10. Label and store in a cool, dark place
This is very good with cold meat, or in place of redcurrant jelly with roast chicken, as well as to accompany cheese, especially richly flavoured cheddar!
Preserves September 2017
Cucumber Relish
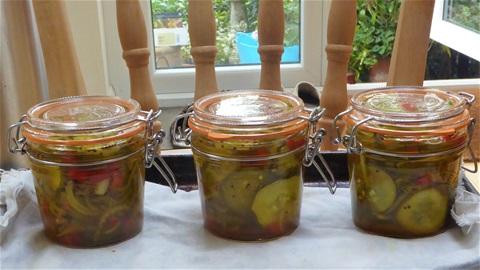
Cucumber Relish
Cucumbers are still being produced virtually daily from the three Diva plants in the polytunnel, and this slightly spicy relish puts them to good use. Whoever would have thought we would still be harvesting cucumbers into October?
What you need: (This quantity filled four 400ml jars, only three are in the picture)
7 cucumbers - mine were 8ins long - thinly sliced.
3 medium sized
onions - peeled and thinly sliced inot half rings
2 large red peppers, seeds and pith removed and cut into thin strips
3 tbsp salt
600 ml white wine vinegar
450g white granulated sugar
1 level tsp ground turmeric
8 cloves, finely
ground
2 tbsp mustard seed, either black or yellow
What to do:
1. Put the cucumber, onion and peppers in a large bowl and mix in the salt. Leave overnight.
2. Prepare your jars and keep them warm
3. Rinse the vegetables in several changes of water to remove most of the salt and leave to drain
4. Put the vinegar, sugar and spices in a pan and warm to dissolve the sugar
5. Add the sliced vegetables, bring to the boil and boil for 1 minute. Take off the heat
6. Using a slotted spoon, pack the vegetables into the warmed jars
7. Reduce the liquid in the pan on ahigh heat for 10 minutes, carefully pour this hot liquid into the jars using a funnel, and put on the lids
This keep well in a cool dark place, lasting for at least six months. The relish is a great accompaniment to burgers in buns, cheese and biscuits or cold meats. A nice reminder of Summer in the depths of Winter really
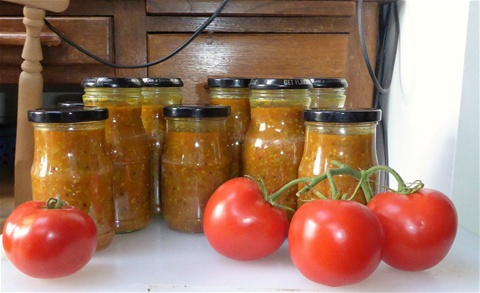
Fruity Chutney
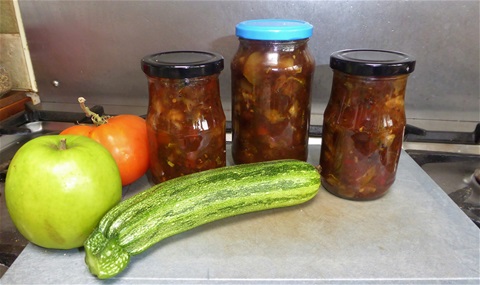
Fruity Chutney
After a week away I came home to a surprising number of ripe tomatoes, a courgette plant that had decided it was time to produce more fruit, and a lot more windfall apples. This mirrored what we had in the fridge already, so this recipe handily made use of the fridge fruits, making space for the freshly picked ones to be stored for a couple of days. I used a combination of some of my favourite spices, but you can change these or leave out anything you are not keen on of course
What you need: (These quantities made just over 750ml)
500g chopped up tomatoes, large white inner pieces removed
500g sliced and cut up courgette
200g peeled apples, cut into 0.5cm cubes
200g sultanas
350ml white wine vinegar
250g sugar (I used half white and half soft brown, as that was what I had in the cupboard)
4tbsp black or yellow mustard seeds
4 cloves of garlic, peeled and minced
5cm piece of ginger, grated
12 whole cloves
12 green cardamom pods
1tsp fennel seeds
2tsp coriander seeds
½ tsp freshly ground nutmeg
What to do:
1. Sort out your jars and sterilise these. Keep them warm
2. Using a mortar and pestle, grind all the dry spices, removing the pods of the cardamoms to only leave the seeds in the mix. Aim for a coarse powder
3. Put all the ingredients, incuding the ground spices in your preserving pan and heat gently, stirring from time to time to ensure the sugar is fully dissolved
4. Now use enough heat for a steady simmer, and cook until the chutney is thick and unctuous, and there is no "loose" vinegar evident when you make a channel across the mixture to expose the bottom of the pan. This took 40 minutes, but it could take longer depending on how juicy your fruit and vegetables are.
5. Pour into warm jars, wipe the edges of the tops and put on the sterile lids
This needs to sit for 2 to 3 weeks to mature and will easily keep in a cool dark place for about a year. There was a little bit that I couldn't sqqueeze into the jars, and it did taste rather good. I am looking forward to eating this with cheese and biscuits, in sandwiches with cold meat and stirred into stews too.
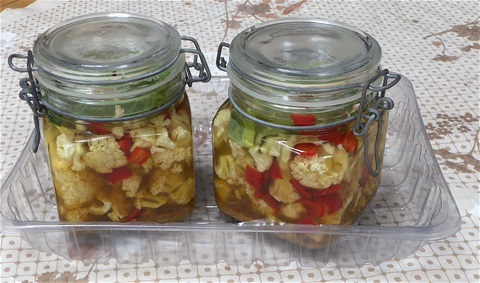
Fermented Cauliflower Pickle on Day 1
Fermented Cauliflower Pickle
This is the first time I have attempted any sort of fermented pickle. After reading round and round I settled on a slight adaptation to a recipe from Cultures for Health. One issue I already have is being able to keep the pickle jars warm enough (60- 70 degC is the recommendation). They are currently sitting on the lid of the fish tank, where there are small but satisfying bubbles now visible
I am using two kilner jars with new seals, but it all you have is screw top jars that is fine (see instruction No 6)
What you need:
Cauliflower, broken into small florets. I measured the amount by what would fit in the two jars I had, and it was one medium sized head. Also keep some of the smaller leaves, as these are useful for keeping the florets under the surface of the brine
2 red peppers, seeds and membrane removed and cut into squares a little smaller than a centimetre Optional really but I thought they would look good with the cauliflower
500 ml water
3tbsp sea salt or kosher salt
4 heads of garlic, peeled and crushed
4tbs yellow mustard seed
½tsp chilli powder or dried flakes
4 tsp ground cumin seeds
2 tsp ground coriander seeds
½tsp ground turmeric
What to do:
1. Once you have measured the volume of cauliflower needed, put this is in a bowl with the peppers. Wash and sterilise your jars
2. Pour the water into a pan, add the salt and heat, stirring until the salt dissolves. Allow this brine to cool to room temperature
3. Divide the spices and garlic equally between the jars
4. Pack the cauliflowers and peppers tightly into the jars, then pour in the brine, leaving a 2cm space at the top. You may not need all of it
5. Use the leaves you saved to tuck in over and down the sides of the cauliflower, to ensure the vegetables stay submerged. Dry the edges of the jar and close
6. Stand the jars on a tray in case of spillage. Keep in a warm place to allow fermentation to begin. You will need to "burp" the jars every day to allow the built up carbon dioxide to escape, by slightly opening the lid. Don't be put off by the cabbagey smell when you open the jar
7. Now this is the imprecise part: warm fermentation needs to continue for between 2 and 6 weesk, to allow the required flavour to develop. I shall try mine after two weeks, and then every week until I like the flavour. The cauliflower will become more yellow as the turmeric circulates
8. When the flavour reaches a spiciness you like, firmly close the lid and move the jars to the fridge. (I have been told that the flavour can continue to develop even in the cold)
And as I am only on Day 3, that is all I can tell you: I shall update when I move the jars to the fridge
Hot Chilli Jam
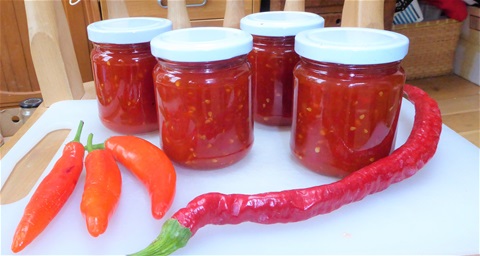
🙂Hot Chilli Jam
This recipe was adapted from one of Dave Dakin's, so thank you to him, although whether he intended it should be quite so volcanic I am not too sure. If you would like a milder version, substitute less hot chillies, such as cayenne, or reduce the number included to your taste. It is quite a flexible recipe really, and is a beautiful colour in the jar.
Words of warning though, if you do use hot chillies: be careful not to get juice in your eyes, wear gloves to prepare them and when washing the pan, add hot water slowly or the sudden release of chilli oil into the air can be breathtaking, quite literally!
These quantities made 1700 ml of jam. Sterilise the jars in advance, keep them hot, and ensure the lids are ready to sterilise with boiling water just before they are needed
What you need:
8 large red peppers, seeds and pith removed, roughly cut up
10 ripe red, hot chillies, such as serrano, ideally ones that are a bit fleshy, seeds and pith removed ( see warning above) and roughly cut
8 large red tomatoes, roughly cut up, no need to skin or de-seed them
4 ins piece of ginger, grated
8 garlic cloves, skinned and finely chopped
450 ml white wine vinegar
700 g white granulated sugar
What to do: (see note above about jars)
1. Using a food processor, in several batches, finely chop the peppers, chillies and tomatoes. Add some of the vinegar to make the mixture more fluid if needed.
2. Put the mixture in a large preserving pan, ideally non-stick, with any remaining vinegar, the ginger, garlic and sugar. Heat gently, stirring to dissolve the sugar
3. Bring to a rolling boil and continue to cook until it is thick and is almost ready to set (I cool some on a saucer from the freezer and if it wrinkles a tiny bit when pushed it is ready) You do not want it too thick so slightly runny is good.
4. Take off the heat (This is the point when you should sterilise the jar lids) leave for three minutes, stir and then pour into jars. Screw lids on immediately, using a cloth to hold the jars to avoid burning your hand
5. This stores for several months in a cool dark place... approach with caution if you have used chillies with a lot of bite!
The jam is good as an "on the side" chutney with biryani, or to accompany cheese, cold meat etc.
Apple & Mint Jelly
Apple & Mint Jelly
This is excellent with lamb, or in a cheese sandwich come to that! It makes good use of those windfall or maggoty apples, and the last big harvest of mint from our plot this year. It is one of those recipes that start with very vague quantities but later on you can see how the balance works out, to arrive at a reasonably savoury jelly.
What you need:
Apples. Any that are damaged and need to be used up, or perfect fruits. Cooking apples, eating apples, a mix of apples, anything except crab apples as these are best kept for their own special scented jelly.
Sugar - a pound for every pint of apple juice you make. White sugar gives the best result imho as it does not detract from the flavour of the mint
MInt - a double handful of a bunch, plus a third of a cupful of finely chopped mint per pint of juice
White wine vinegar (or cider vinegar) - a half cupful for every pint of juice
What to do:
1. Wash the apples and cut out any rotten, bruised or maggoty bits. Do not peel them or remove the cores (Unless they are rotten) as this makes sure there is plenty of pectin to set the jelly. Chop them into small pieces or blitz in a food processor until around a centimetre or so in size.
2. Put in your preserving pan with enough water to come about half way up the apples in the pan. If you put in more it does not matter, it just means a longer boiling time at the end. Add the big bunch of mint.
3. Cook for about 20 minutes until the apple is very soft and the contents of the pan looks like mush with mint stems in it.
4. Tip this mush and stems into a jelly bag and leave to drip over a large bowl for about three hours. Do not squeeze the bag if you want the jelly to be clear.
5. Put a saucer or small plate into the freezer to use when you test the jelly for a set later. Make sure you have sterile jars warming, and pour bioling water onto the lids in a small bowl.
6. Measure the juice before pouring it back into the (washed) preserving pan, with the measured amount of sugar and the vinegar.
7. Bring to the boil, and boil for around 25 -30 minutes, skimming off any scum resulting from the waxes in the skin of the apples
8. Test for a set with a teaspoonful of juice on the cold saucer. If this does not wrinkle when pushed as it cools, boil for a further three minutes. Repeat every three minutes until setting point is reached
9. Take the pan off the heat and cool for 5 minutes before stirring in the chopped mint
10. Stir again and pour into jars, putting on the sterile lids immediately
The colour of the apple juice varies according to the apples used. Last year's batch was very pale, translucent pink, made from Greensleeves apples, but this year I used all Bramley's Seedlings and the resultant juice was a much more robust colour. It also tastes less sweet than last year's as the apples themselves have less sugar in them. If you find yours too sweet for your personal preference, add a little more vinegar before the setting point is reached
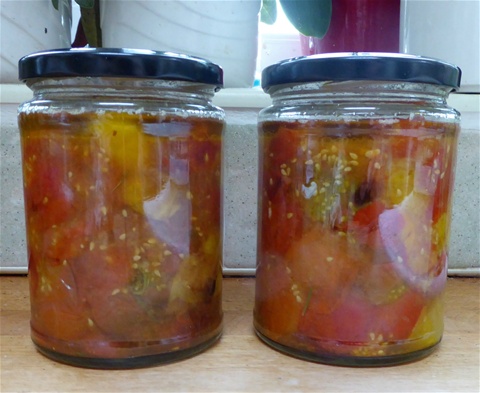
Cherry tomatoes in olive oil
Another tomato recipe! This one makes a change from chutney or sauces and again, uses a nice lot of tomatoes if you need to reduce your personal tomato mountain. You can also make a smaller quantity perfectly well of course!
Oven- baked cherry tomatoes in olive oil
This quantity makes two 350ml jarsful.
What you need:
1.5 kg of cherry tomatoes (I used a mix of colours, and supplemented it with a few medium sized tomatoes cut in half)
2 cups of olive oil (Use one you like the flavour of)
6 cloves of garlic, sliced thinly
½ cup of chopped herbs of your choice (I have made three batches and used rosemary, thyme and oregano - not all at the same time)
salt and coarsely ground black pepper to taste
What to do:
1. Line a large oven tray with foil, turn on the oven (100 °C) and make sure your jars are sterlised and kept warm
2. Put the tomatoes in a large bowl with the garlic and herbs
3. Pour in the olive oil and mix gently with your hands, making sure all the tomatoes are covered
4. Tip the tomatoes onto the tray and spread them out evenly
5. Sprinkle with salt -sea salt is nice - and pepper to taste
6. Put the tray in the oven and cook for around 2 hours, mixing them around carefully a couple of times
7. When the tomatoes are shrunken and slightly dark around the edges, they are done. The time this takes depends on the juiciness of your tomatoes. The first batch took 2hrs 15mins but the second was ready after 1hr 45mins.
8. Taken the tray out of the oven and remove as much of the garlic as you can - this does not always preserve well and might affect the tomatoes.
9. Carefully transfer the tomatoes into the warmed jars. Use a bamboo skewer to ensure there are no trapped airbubbles.
10. There will probably be enough oil to completely cover the tomatoes. but if not, top the level up with more olive oil
11. Put on the lids.
Opinions vary as to how long this stores for. In a cool place it should last at least three months and I would actually be expecting six. Keep the oil topped up to cover the tomatoes if any are sticking up after you take some out.If you keep the jar in the fridge, the olive oil may solidify. Don't worry, it will be fine as it warms up again, it is perfectly normal.
The totmatoes are delicious spread on hot toasted bread, added to a home made pizza topping, as an addition to pasta sauce, sliced into a salad, or as a side dish with a barbecue. I am sure you will think of plenty more ways to use them.
"Cook-in" tomato sauce
Recipes that use up a lot of tomatoes in one go are very appealing at this time in the year, as we often have a huge glut. Here are two that use up 2kg each, one old favourite and one which is new to me: "Cook-in" Sauce and Tomato Ketchup
Tomato "Cook-in" Sauce
There are lots of "cook-in" sauces available commercially, and their list of ingredients is many and varied, not always something I would necessarily want to eat. The convenience of being able to open a jar of sauce, add it to some meat, fish, lentils or other vegetables and quickly have a tasty meal is very tempting, so I tried to come up with a home made version... and this it it! I make several batches each year with different flavourings, to see us the year round. We don't have enough freezer space for this amount of tomatoes, so these jars of sauce enable us to preserve our bounteous harvest in a practical way, with a method used for many years before refrigeration was an option.
The basic recipe can be varied to suit your personal taste by adding spices or herbs, or leaving it plain to be added to when you use it. There is one vital criteria however: you must have at least 7 cups of tomato to no more than 4 cups of the other vegetable ingredients to ensure the balance of acidity allows the sauce to be kept safely without danger of botulism.
Read through the whole recipe before you start to ensure you will have the equipment you need to hand for waterbathing the finished sauce.
What you need:
2kg of large tomatoes (at least 7 cups when processed, usually 8 or 9)
1½ cups of chopped onion
5 cloves of garlic, chopped
2½ -3 cups of other vegetables, measured after chopped - courgettes, runner beans, coriander leaves, carrot, beetroot, green or red peppers etc. (Not potato) I put them in the food processor so that the pieces are very small and almost unidentifiable as individual pieces when cooked
1tps salt
2tsp sugar
1 cup of white wine vinegar
3tbp sunflower oil
spices or herbs to taste - just think of the number of jars you will be making and what quantity you would use for that volume. In this batch I used 5 heaped tsp each of black mustard seeds, ground cumin and ground coriander, 5tsp grated fresh ginger, 3tsp ground turmeric and 5 large red chillies, which were chopped with the onions and garlic.
What to do:
1. Sort out your jars and lids and sterilise them - this quantity makes between 2.5 & 3l of sauce, depending on how much your veg cooks down...coriander cooks down far more than runner beans for example. I find 350ml jars a useful size.
2. Finely chop the onions, garlic, and chillies if using, and put in the preserving pan with the oil. Cook until onion is soft
3. Add spices if using, including the ginger and fry until seeds are popping and there is no raw smell of spices (not dried or fresh herbs at this point)
4. While the onion is cooking, skin the tomatoes and remove the cores ( I slit the skins and pour boiling water over them, leave for 10 minutes and then, wearing gloves, pull off the skins and squidge out the cores, directly over the food processor bowl. The gloves save my hands from turning orange, especially if I am making two batches!)
5. Put the tomatoes in a food processor and blend until well chopped (You can also chop them by hand of course) and then add them to the pan.
6 Finely chop any other vegetables and add to the pan, together with all remaining ingredients (Add herbs at this point if using)
7. Now bring to the boil and simmer for 15 minutes, without a lid on the pan.
8. Warm the jars, sterilise the lids and get the waterbath ready - part-fill a large pan with boiling water. You will need a trivet in the bottom to stand the jars on, so that the glass is not in direct contact with the metal pan.
9. Adjust the seasoning to your taste, with a little more salt or sugar, or more vinegar if too sweet
10. Pour the sauce into jars and put on lids immediately. Do not overtighten the lids though as air must be able to escape when the jars are in the waterbath. Fill the kettle and boil.
11. Now carefully stand the jars on the trivet in the waterbath. Use an oven mitt to protect your hands as the jars and the water are both hot!
12. Pour in boiling water from the kettle so that the water is up to the top of the sides of the bottles. (Some recipes tell you to submerge the jars completely but my pan is not quite deep enough for that, and it has always worked fine with slightly less depth)
13. Keep the water at a high simmer for 20 minutes and then carefully lift out the jars. Tighten the lids slightly, and leave to cool. If you have pop-in centres to the lids, you will hear them pop down as the sauce cools.
This sauce keep safely for over a year in a cool, dark place. We find it especially enjoyable in the long dark days of winter when there is little variety in fresh crops: a lovely reminder of early Autumn flavours!
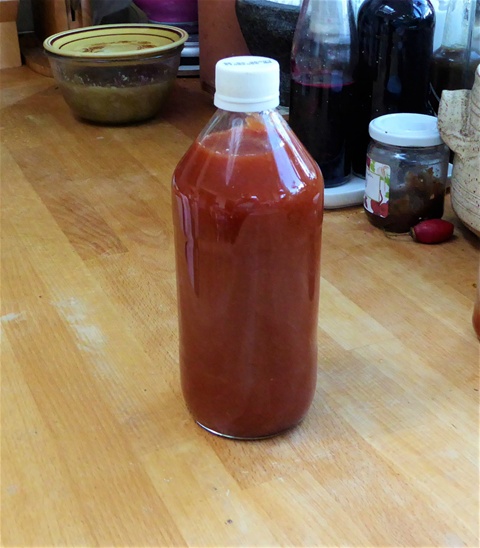
Tomato Ketchup
Tomato Ketchup
This is the healthiest, tastiest version of tomato ketchup I have ever had, and you may well think the same! This is the first year I have made it, and it is so good I have already made a second batch. 2kg of tomatoes are needed for 500ml of sauce, so it certainly made a dent in the tomato mountain in our kitchen right now!
The original recipe was published in Delicious magazine
What you need:
2kg tomatoes - big, fat red ones are best
2 chopped onions -- a good way to use up some that are not suitable for long term storage
2 chopped garlic cloves
150 ml red or white wine vinegar
100 ml water
2 bay leaves
6 allspice berries (or two heaped tsp of ground allspice)
6 black peppercorns
4 cloves
1 blade of mace
1 - 1½ tbsp light brown sugar
What to do:
1. Roughly chop the tomatoes and put in a large preserving pan with the onions and 50 ml of the vinegar and the water, bring to the boil and simmer for 45 minutes
2. Put the remaining vinegar in a small saucepan, with the spices and 1tbsp of the sugar, bring to the boil, then leave to infuse. If you are using ground allspice, add it to the tomato mix, not the vinegar
3. Once the tomato mix is cooked, leave it to cool so that you can work with it without burning yourself
4. In a food processor or using a stick blender, reduce the tomato mix to a pulp. Rub this pulp through a fine sieve using a wooden spoon (Took me about 10 minutes)
5. Put the sieved pulp back into the washed preserving pan. Take out the whole spices from the vinegar and pour this in with the tomatoes
6. Cook down gently, until there is about 500ml left. If you can draw a wooden spoon across the bottom and it does not fill back in with sauce, it is thick enough
7. Taste, and add more sugar if required.
8. Using a funnel, pour into a sterilised bottle and screw on the top immmediately.
The sauce will keep for at least six months in a cool dark place, and I suspect much longer. However, once it is opne, keep it in the fridge. I shall be looking for some smaller bottles to divide the next batch into two
Kathy
Hi Diana. 1 cup of tomatoes weighs approx 175g and so does one cup of sugar. Hope that helps!
Diana Morgan
for the tomato ketchup, how do the cup measurements translate into weights?
Anne Noble
I like the chili jam recipe, but does it only make 165ml? Doesn't seem very much for the amount of fruits.
Kathy
Aah yes of course. .. silly mistake! !
AnneN
I see, I think you've lost a zero somewhere there but I know what you mean, thanks I'll try that xx
Kathy
Yes it cooks down a lot. I filled the four 300ml jars and one 500ml jar, which is 170ml but it could have cooked down slightly more. It is very concentrated